by Tracy | Jan 15, 2021 | Designer Series Paper, Die-Cutting, Embossing Folders, Free Tutorial

Happy Friday!! Today’s FREE PDF Friday Tutorial is for a card I shared earlier this week. If you missed that post, you can see it here. You can access the tutorial below the supply list. Have a great weekend!

Supply List
If you need any stamping supplies, I’d love to be your demonstrator! You can place an order by clicking any of the images below to go to my Stampin’ Up! online store. If you have questions about products you’re considering purchasing or ones you’ve already purchased, I’m just an email away (click the Email Me button on the sidebar of my blog).


Starter Kit
The Starter Kit is always a great deal but during Sale-a-Bration it’s even better! Purchase the No Risk Stampin’ Up! Starter Kit for $99 and you’ll have all the perks of being a demonstrator such as a 20% discount on everything you purchase! You’ll choose $125 worth of Stampin’ Up! products that YOU want. There’s absolutely no risk to purchasing the Starter Kit because if you purchase it JUST for the discount, that’s perfectly fine! Or you may want to start your own business. It’s an even better deal during Sale-a-Bration because you’ll also receive 200 sheets of new designs of 6” x 6” Designer Series Paper that will be released in the 2021-2022 Annual Catalog, a $57.50 value.
Click here for more information or feel free to email me with any questions you might have. Ready to purchase the Starter Kit? Click here!
Tracy’s Quick Links
Place an Order
Clearance Rack
$99 Starter Kit
Paper Pumpkin
Tracy’s Customer Rewards
Bradley Points
by Tracy | Jan 14, 2021 | Die-Cutting, Embossing Folders, Stampin' Cut & Emboss Machine
Valentine’s Day will be here before you know it but really, today’s card could be given to anyone at any time of the year.

I started with a base of Petal Pink cardstock and added a layer of Basic White that I first embossed with the Tasteful Textile 3D Embossing Folder.
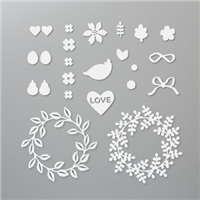
Using the Wreath Builder Dies, I cut a wreath out of Petal Pink cardstock and another one using Garden Green cardstock. I cut Mini Stampin’ Dimensional in half and placed them on the back of the green wreath before placing it on the card front. I rolled glue dots between my fingers (high tech here) and placed them in strategic spots on the Petal Pink wreath before adhering it to the other wreath. Another alternative is to add dots of Multipurpose Glue to the wreath instead of glue dots.
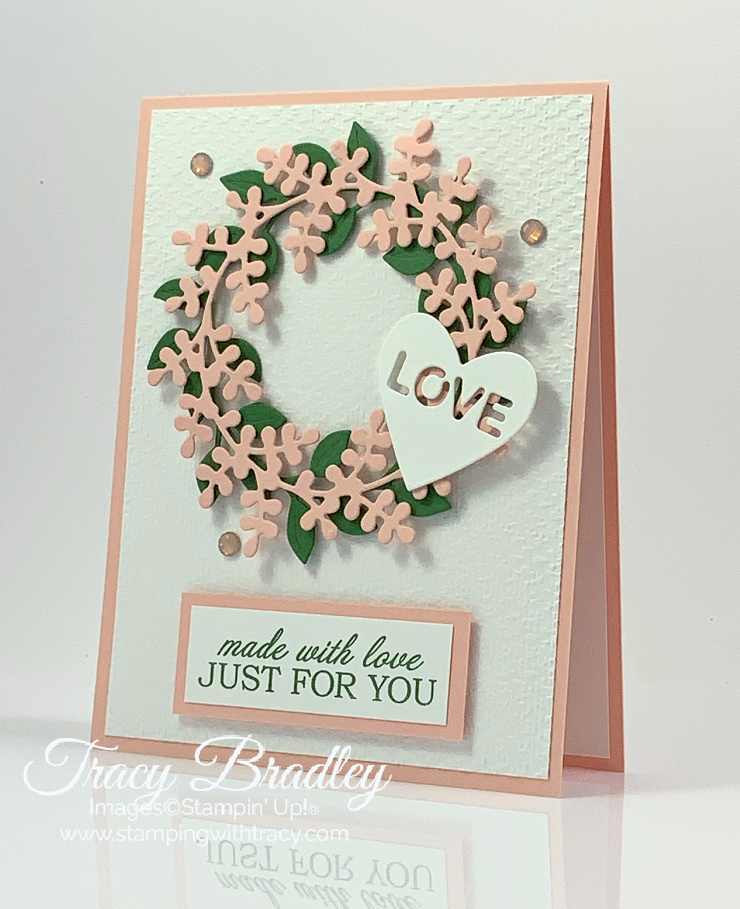
I also used the Wreath Builder Dies to cut out the Basic White heart and used more glue dots to adhere it to the wreath.
The sentiment was stamped in Garden Green ink onto Basic White cardstock using the Quite Curvy stamp set and layered onto a piece of Petal Pink cardstock. I added Stampin’ Dimensionals to the back before adhering it to the card front. To complete the card, I added three Elegant Faceted Gems to the front. If you’d like to make today’s card, you can find all the measurements I used below the Supply List.
Please note: My card today was created using Whisper White cardstock but the mill that made it for Stampin’ Up! had to close down and Whisper White is no longer available. Basic White is its replacement and is now available. To add less confusion, I’ve referred to Basic White throughout my post.
Supply List
If you need any stamping supplies, I’d love to be your demonstrator! You can place an order by clicking any of the images below to go to my Stampin’ Up! online store. If you have questions about products you’re considering purchasing or ones you’ve already purchased, I’m just an email away (click the Email Me button on the sidebar of my blog).
Measurements
- Petal Pink cardstock: 11″ x 4-1/4″ score at 5-1/2″
- Petal Pink cardstock: approx. 4″ x 4″ for wreath
- Petal Pink cardstock: 2-5/8″ x 1″
- Basic White cardstock: (2) 5-1/4″ x 4″
- Basic White cardstock: 3/4″ x 2-3/8″
- Basic White cardstock: scrap for heart
- Garden Green cardstock: approx. 4″ x 4″ for wreath

Use my current host when placing your order and I’ll send you an extra card kit. Please do NOT use the host code when your order is $150 or more, because at $150 you start earning Stampin’ Rewards directly from Stampin’ Up! (if you use my host code, you will not be able to use the rewards). If your order is over $150, I’ll automatically send you an extra card kit. Click here to place an order.
Tracy’s Quick Links
Place an Order
Clearance Rack
$99 Starter Kit
Paper Pumpkin
Tracy’s Customer Rewards
Bradley Points
by Tracy | Jan 13, 2021 | Designer Series Paper, Die-Cutting
Today’s card features Ice Cream Corner Designer Series Paper which can be found in the January-June 2021 Mini Catalog. Ice Cream is one of my MOST favorite foods (love it!) so I was immediately drawn to this paper but you won’t find any ice cream in sight on my card today.


The colors in this package of paper make me so happy! They are:
- Bermuda Bay
- Blackberry Bliss
- Bumblebee
- Cinnamon Cider
- Old Olive
- Petal Pink
- Pool Party
- Purple Posy
- So Saffron
- Soft Sea Foam
- Terracotta Tile
- Basic White
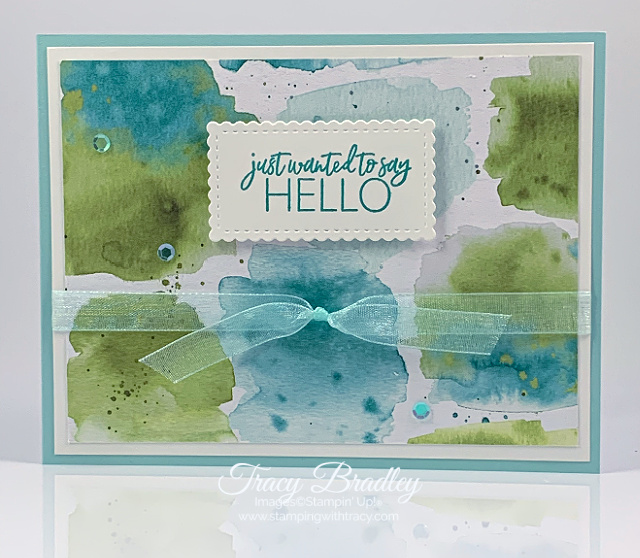
The base of my card is Pool Party cardstock with layers of Basic White cardstock and Ice Cream Corner Designer Series Paper. Before adhering the Basic White/Designer Series Paper layer, I wrapped our beautiful Pool Party Sheer Ribbon around the cardstock.
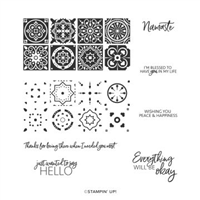
The sentiment was stamped onto Basic White cardstock with Bermuda Bay ink using the stamp set, Today’s Tiles (I love the fonts used in this set) and was cut out using the Stitched So Sweetly Dies. I popped the sentiment up using Stampin’ Dimensionals.

To complete the card, I added three Artistry Blooms Adhesive Backed Sequins to the front. You can find a list of all the supplies I used in the Supply List below.

If you’d like to make today’s card, you can find the measurements I used below the Supply List.
Supply List
If you need any stamping supplies, I’d love to be your demonstrator! You can place an order by clicking any of the images below to go to my Stampin’ Up! online store. If you have questions about products you’re considering purchasing or ones you’ve already purchased, I’m just an email away (click the Email Me button on the sidebar of my blog).
Measurements
- Pool Party cardstock; 11″ x 4-1/4″
- Basic White cardstock: 5-1/4″ x 4″
- Basic White cardstock: scrap for sentiment
- Ice Cream Corner Designer Series Paper: 5″ x 3-3/4″
Use my current host when placing your order and I’ll send you an extra card kit. Please do NOT use the host code when your order is $150 or more, because at $150 you start earning Stampin’ Rewards directly from Stampin’ Up! (if you use my host code, you will not be able to use the rewards). If your order is over $150, I’ll automatically send you an extra card kit.

The Starter Kit is always a great deal but during Sale-a-Bration it’s even better! Purchase the No Risk Stampin’ Up! Starter Kit for $99 and you’ll have all the perks of being a demonstrator such as a 20% discount on everything you purchase! You’ll choose $125 worth of Stampin’ Up! products that YOU want. There’s absolutely no risk to purchasing the Starter Kit because if you purchase it JUST for the discount, that’s perfectly fine! Or you may want to start your own business. It’s an even better deal during Sale-a-Bration because you’ll also receive 200 sheets of new designs of 6” x 6” Designer Series Paper that will be released in the 2021-2022 Annual Catalog, a $57.50 value.
Click here for more information or feel free to email me with any questions you might have. Ready to purchase the Starter Kit? Click here!
Tracy’s Quick Links
Place an Order
Clearance Rack
$99 Starter Kit
Paper Pumpkin
Tracy’s Customer Rewards
Bradley Points
by Tracy | Jan 12, 2021 | Designer Series Paper, Die-Cutting, Embossing Folders, Triple Banner Punch
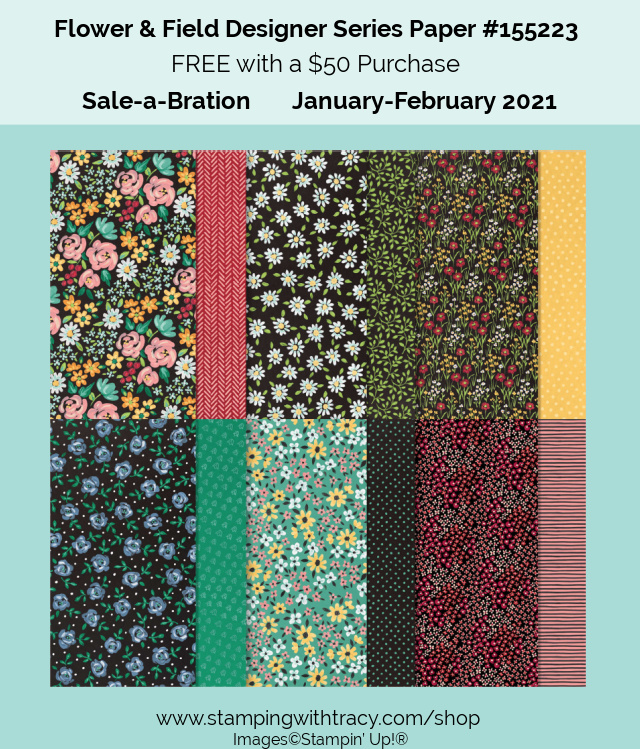
Making today’s card was a little out of my comfort zone but I created it while taking part in a card sketch challenge. I used Flower & Field Designer Series Paper, one of the products you can earn FREE with a $50 order during Sale-a-Bration.

I started with a base of Flirty Flamingo cardstock and added a layer of Basic White cardstock that I ran through the Tasteful Textile embossing folder using the Stampin’ Cut & Emboss Machine. Using the largest dies in the Layering Circles Dies, I cut a Basic White circle and a Flirty Flaming scalloped circle. I embossed the Basic White circle with the Tasteful Textile Embossing Folder and then layered the two pieces together.
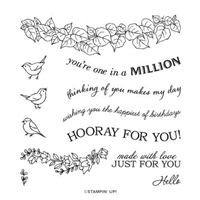
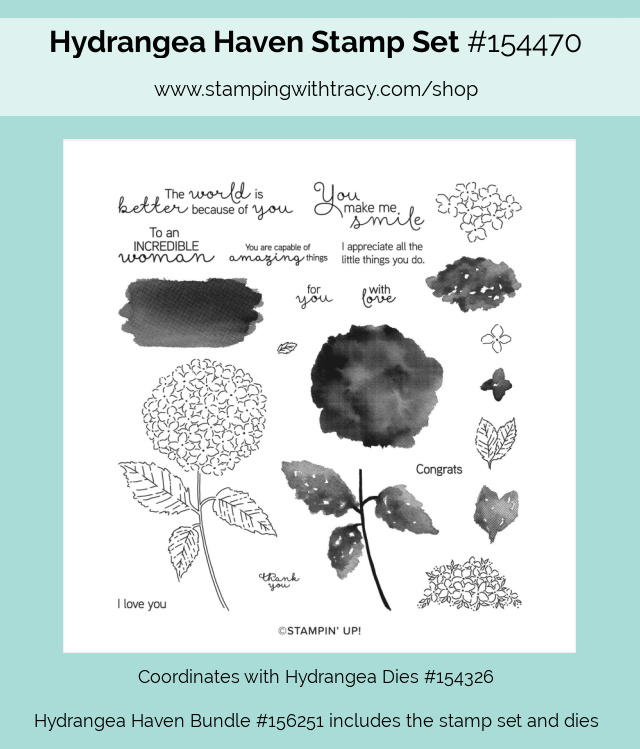
I used the Triple Banner Punch to create banners using Flirty Flamingo cardstock and Flower & Field Designer Series Paper. The sentiment was stamped in Flirty Flamingo ink onto Basic White cardstock using the stamp set Hydrangea Haven and then it was layered onto a piece of Flirty Flamingo cardstock. Both pieces were cut out with the Stitched So Sweetly Dies.

If you’d like to make today’s card, you can find all the measurements below the Supply List.
Supply List
Measurements
- Flirty Flamingo cardstock: 11″ x 4-1/4″
- Flirty Flamingo cardstock: 4-3/4″ x 1-3/4″
- Flirty Flamingo cardstock: scrap for scalloped circle
- Basic White cardstock: 5″ x 3-3/4″
- Basic White cardstock: scrap for circle
- Basic White cardstock: 5-1/4″ x 4 (inside card)
- Basic White cardstock: scrap for sentiment
- Flower & Field Designer Series Paper: 4-1/2″ x 1-1/2″
Use my current host when placing your order and I’ll send you an extra card kit. Please do NOT use the host code when your order is $150 or more, because at $150 you start earning Stampin’ Rewards directly from Stampin’ Up! (if you use my host code, you will not be able to use the rewards). If your order is over $150, I’ll automatically send you an extra card kit.
Tracy’s Quick Links
Place an Order
Clearance Rack
$99 Starter Kit
Paper Pumpkin
Tracy’s Customer Rewards
Bradley Points
by Tracy | Jan 11, 2021 | Designer Series Paper, Die-Cutting, Embossing Folders
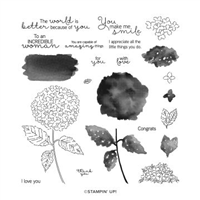
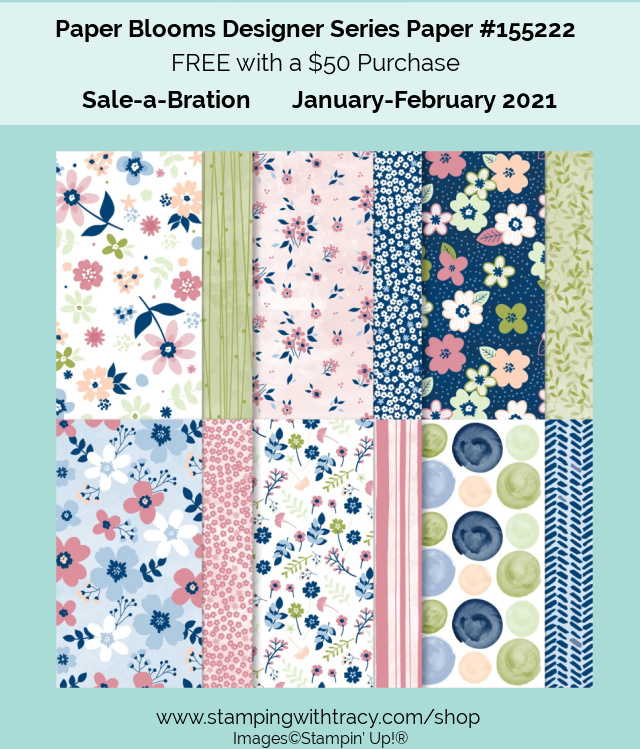
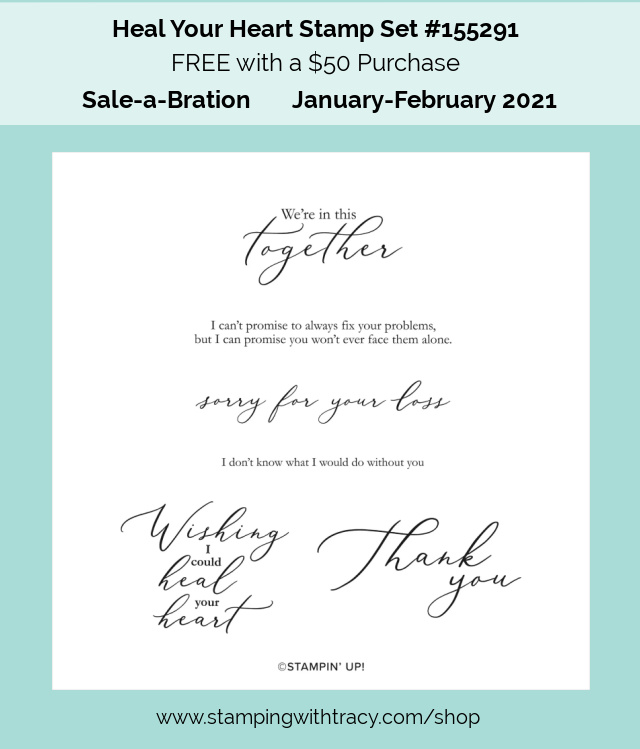
Today’s card features Paper Blooms Designer Series Paper and the stamp set, Heal Your Heart. Both products are part of the Sale-a-Bration promotion and can be chosen, FREE, with a $50 purchase (before tax/shipping). Place a $50 order and you can choose either the paper or the stamp set. Place a $100 order and you can choose both products or choose from the other products available.
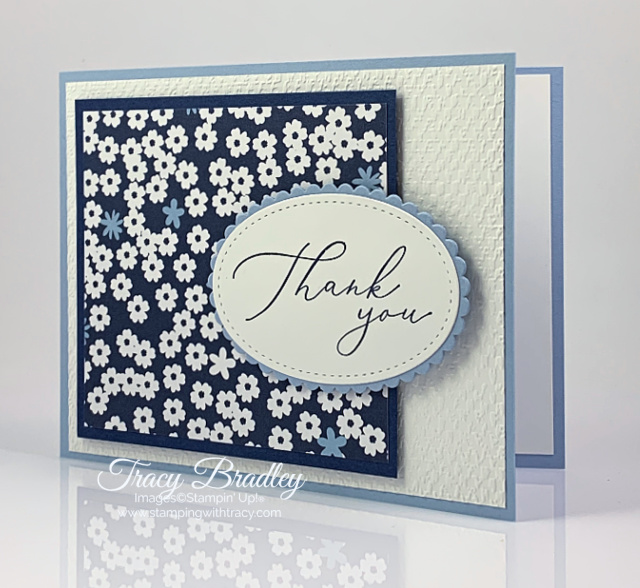
The base of my card is Seaside Spray cardstock and then I added a layer of Basic White cardstock that I ran through the Cut & Emboss Machine using the Tasteful Textile embossing folder. The Paper Blooms Designer Series Paper and Night of Navy cardstock panel has Stampin’ Dimensionals on the back.
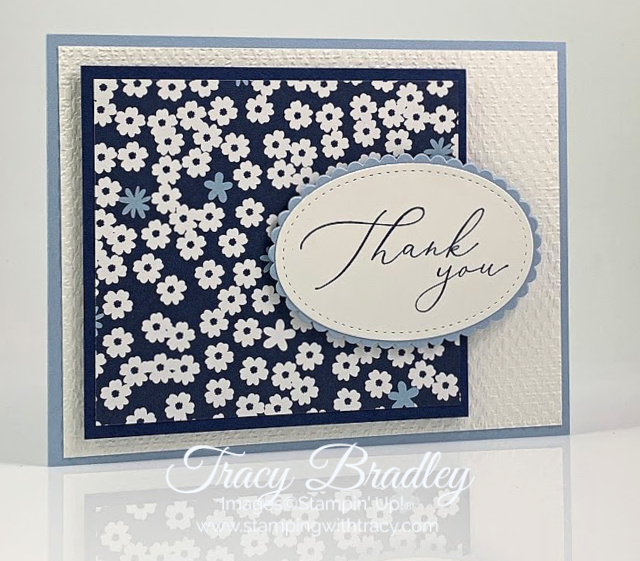
The sentiment was stamped onto Basic White cardstock using Night of Navy ink and the Heal Your Heart stamp set. It was cut out using the Stitched Shapes Dies and layered with a Seaside Spray scalloped oval (cut out with the Layering Ovals Dies). On the back of the Seaside Spray oval, I added Stampin’ Dimensionals to the right side and down the center, only. If you’d like to make today’s card, you can find the measurements I used below the Supply List.

Supply List
If you need any stamping supplies, I’d love to be your demonstrator! You can place an order by clicking any of the images below to go to my Stampin’ Up! online store. If you have questions about products you’re considering purchasing or ones you’ve already purchased, I’m just an email away (click the Email Me button on the sidebar of my blog).
Measurements
- Seaside Spray cardstock: 11″ x 4-1/4″
- Seaside Spray cardstock: scrap for scalloped oval
- Basic White cardstock: (2) 5-1/4″ x 4″
- Basic White cardstock: scrap for sentiment
- Night of Navy cardstock: 4″ x 3-5/8″
- Paper Blooms Designer Series Paper: 3-3/4″ x 3-3/8″
Use my current host when placing your order and I’ll send you an extra card kit. Please do NOT use the host code when your order is $150 or more because at $150 you start earning Stampin’ Rewards directly from Stampin’ Up! (if you use my host code, you will not be able to use the rewards). If your order is over $150, I’ll automatically send you an extra card kit.

Tracy’s Quick Links
Place an Order
Clearance Rack
$99 Starter Kit
Paper Pumpkin
Tracy’s Customer Rewards
Bradley Points