by Tracy | Jun 17, 2019 | Designer Series Paper, Die-Cutting, Fun Fold Card, Layering Ovals Dies, Stitched Shapes Dies

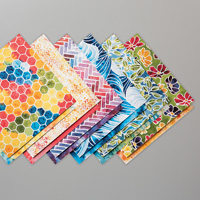
If you love bold, vibrant colors, you’re going to love the brand new See a Silhouette Designer Series Paper! This paper coordinates with so many beautiful colors:
Blackberry Bliss
Crushed Curry
Daffodil Delight
Flirty Flamingo
Mango Melody
Mossy Meadow
Night of Navy
Old Olive
Pacific Point
Poppy Parade
Pumpkin Pie
Real Red
Rich Razzleberry
Whisper White

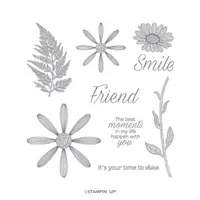
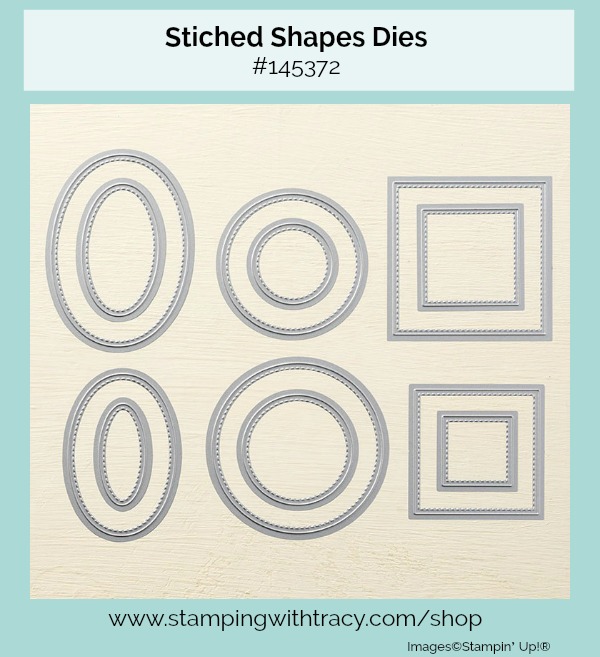
To create today’s Fun Fold card, I used the stamp set Daisy Lane. It was cut out with the the Layering Ovals Dies and layered with the Stitched Shapes Dies. The Stitched Shapes Dies are very versatile and also coordinate with the Layering Circles Dies and Layering Squares Dies.

Bundle Alert

Directions for Today’s Card
- Cut a piece of Night of Navy cardstock that measures 5-1/2″ x 7-1/2″. Score at 4-1/4″. Fold on the score line. This will be your card base.
- Cut a piece of See a Silhouette Designer Series Paper that measures 3″ x 5-1/4″. Glue to the front of the card.
- Cut a piece of Whisper White cardstock that measures 4″ x 5-1/4″. Glue to the inside of the card.
- Using the stamp set Daisy Lane, stamp the sentiment onto Whisper White cardstock using Night of Navy ink. Using a die-cutting machine, cut it out with the Layering Ovals Dies. Cut a larger oval in Night of Navy cardstock using the Stitched Shapes Dies. Glue the sentiment onto the Night of Navy oval using Snail. Turn it over to the backside and add Stampin’ Dimensionals only to the right side and down the middle (if you add them to the other side, your card won’t open). Attach to the front of the card.
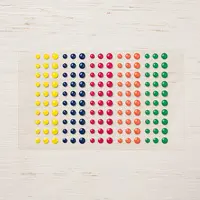
- To complete the card, add three Night of Navy enamel dots below the word “Friend”.

Supply List
If you need any stamping supplies, I’d love to be your demonstrator! You can place an order by clicking any of the images below to go to the homepage of my Stampin’ Up! online store. If you have questions about products you’re considering purchasing or ones you’ve already purchased, I’m just an email away (click the Email Me button on the sidebar of my blog).
I hope you enjoyed today’s card!
Click here to place an order.


by Tracy | Jun 14, 2019 | Designer Series Paper, Layering Ovals Dies

Before I share today’s card I just wanted to mention something. In the past week or so, I’ve received three orders where the customer has chosen No Contact during checkout. What this means is that the customer would prefer I not be given their name or address. This is perfectly fine but the last time I received a No Contact order, the customer didn’t realize that No Contact had been chosen. When No Contact is marked off, I cannot send a thank you card or free card kits because Stampin’ Up! will not release your name to me. If you’ve recently placed an order and haven’t heard from me and mistakenly checked the No Contact box, please contact me by clicking the email me button on the right side of my blog. (more…)
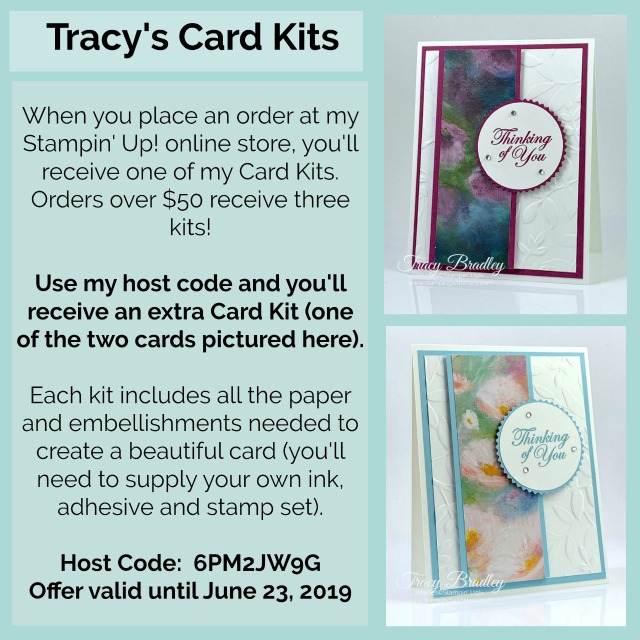
by Tracy | Jun 13, 2019 | Card Kit, Designer Series Paper, Embossing Folders, Punches
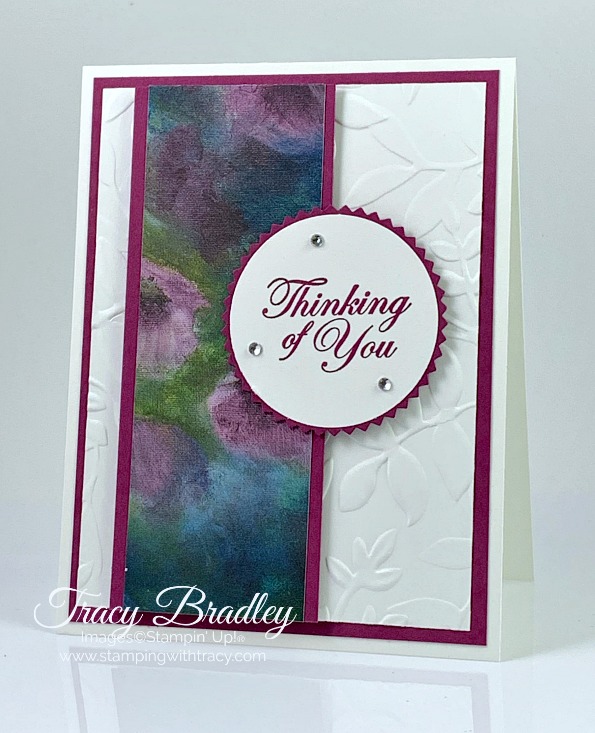
This card is one of two card kits I’m now sending out to anyone who places an order at my Stampin’ Up! online store (you can see the other card here). In your kit you’ll receive all the paper and embellishments needed to create a beautiful card and everything will be cut, punched, and embossed for you! You’ll also receive a PDF Tutorial to guide you as you make your card. I keep all my tutorials in a binder so I can refer to them over and over again. I simply change up the products I use and I have a brand new card! (more…)
by Tracy | Jun 12, 2019 | Designer Series Paper, Die-Cutting, Layering Ovals Dies
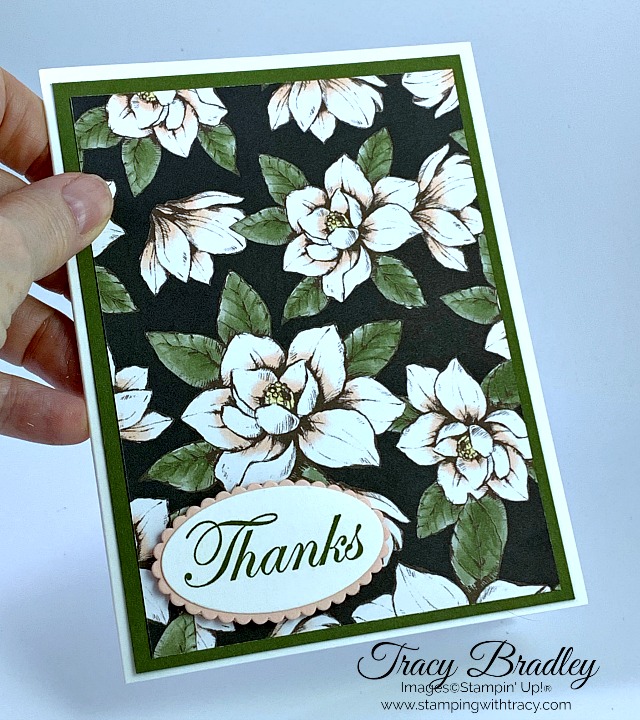
There are many new packages of Designer Series Paper in the new Stampin’ Up! Annual Catalog and the one on my card today is Magnolia Lane. When you have beautiful paper as your focal point on a card, you really only need a sentiment and coordinating cardstock! (more…)
by Tracy | Jun 10, 2019 | Card Kit, Designer Series Paper, Embossing Folders

Every order placed at my Stampin’ Up! online store receives at least one card kit and today’s card is one of two cards I’m currently sending. I also send a PDF Tutorial that includes pictures, a supply list and directions. All of the paper included in each kit is cut, punched, die cut and embossed. You just need to supply your own ink, stamp set & adhesive (see the supply list below for these products).
I used the beautiful Perennial Essence Designer Series Paper along with Balmy Blue cardstock. The stamp set I used is a brand new new one called Good Morning Magnolia. (more…)
by Tracy | Jun 6, 2019 | Designer Series Paper, Gift Card Holder, Glitter Queens Blog Hop, Rectangle Stitched Dies

It’s time for the Glitter Queens Blog Hop and this month it’s all about men! I have to admit, it was REALLY hard for me to come up with a card suitable for a man. Ever since I lost my dad almost ten years ago, I just haven’t been able to make a Father’s Day card. I’ve made cards for my husband but I usually sneak in some feminine touches. It’s so hard not to add a rhinestone or two!!!
I tend to give my brother in law gift cards so I made my cards today with him in mind! I made a video last year showing how to create this type of gift card holder which you can view here! (Please note: many of the products in the video have retired). (more…)