by Tracy | Oct 18, 2021 | Designer Series Paper, Embossing Folders
Happy Monday! I hope you had a nice weekend!
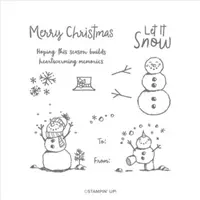
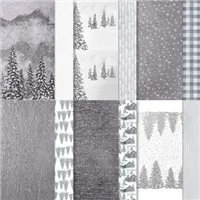
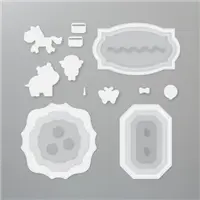
Today’s card features Peaceful Place Designer Series Paper, Wintry 3D Embossing Folders and the stamp set, Snowman Season.


I started with a base of Thick Whisper White cardstock and then added a layer of Smoky Slate cardstock that I ran through one of the Wintry 3D Embossing Folders. The entire piece of cardstock doesn’t fit in the the embossing folder but that’s okay. Just adhere it to your card base with the unembossed part on the left. Next, I added a strip of Peaceful Place 12″ x 12″ Designer Series Paper (you can find all the measurements I used below the Supply List) to the front of the card.

Then I stamped the sentiment and snowman from the Snowman Season stamp set onto a piece of Basic White cardstock using Memento Ink. If you don’t want the tree to be black, you can do what I did. I took a small post it note (just the sticky part) and placed it over the tree and then I inked up the stamp set. I then took off the post it and used my Old Olive Stampin’ Write Marker (don’t use Stampin’ Blends) and colored directly onto the stamp with the marker. At this point, you’ll have to huff all over the stamp to reactivate the ink (it feels silly but it works) and then stamp onto your paper.


I colored the snowman’s hat and scarf using the Dark Cherry Cobbler Stampin’ Blend and the Dark Pumpkin Pie Stampin’ Blend for his nose. I used the Light Balmy Blue Stampin’ Blend under the snowman. Then I adhered the snowman to a piece of Silver Foil Specialty Paper. I added Stampin’ Dimensionals to the back and adhered it to the front of the card. The final touch was to add three white Elegant Faceted Gems to the front of the card.

Supply List
Below you’ll find all the Stampin’ Up! supplies I used for today’s card. If you need any stamping supplies, I’d love to be your demonstrator! You can place an order by clicking any of the images below to go to my Stampin’ Up! online store.
The Specialty Plate is used with 3D Embossing Folders.
Measurements
- Thick Basic White cardstock: 11″ x 4-1/4″ score at 5-1/2″ OR 8-1/2” x 5-1/2” score at 4-1/4” (the only difference is how your card opens)
- Smoky Slate cardstock: 5-1/4″ x 4″
- Peaceful Place Designer Series Paper: 5″ x 2″
- Silver Foil Specialty Paper: 3-1/2″ x 2-3/4″
- Basic White cardstock: 3-1/4″ x 2-1/2


November Paper Pumpkin

- Kit contains enough supplies to create nine treat packages—three each of three designs—and nine food-safe bags.
- This all-inclusive kit includes printed die cuts, die-cut boxes, cellophane treat bags, adhesive, and more!
- Includes an exclusive stamp set and a Classic Stampin’ Spot
- Coordinating colors: Evening Evergreen, Flirty Flamingo, Old Olive, Pool Party, Poppy Parade
- Subscribe by November 10, 2021
Click here to order Paper Pumpkin
You can cancel at any time or even skip a month
Enjoy your day!
by Tracy | Oct 15, 2021 | Designer Series Paper, Die-Cutting, Free Tutorial

Can you believe it’s already Friday? It’s time for weekend plans!
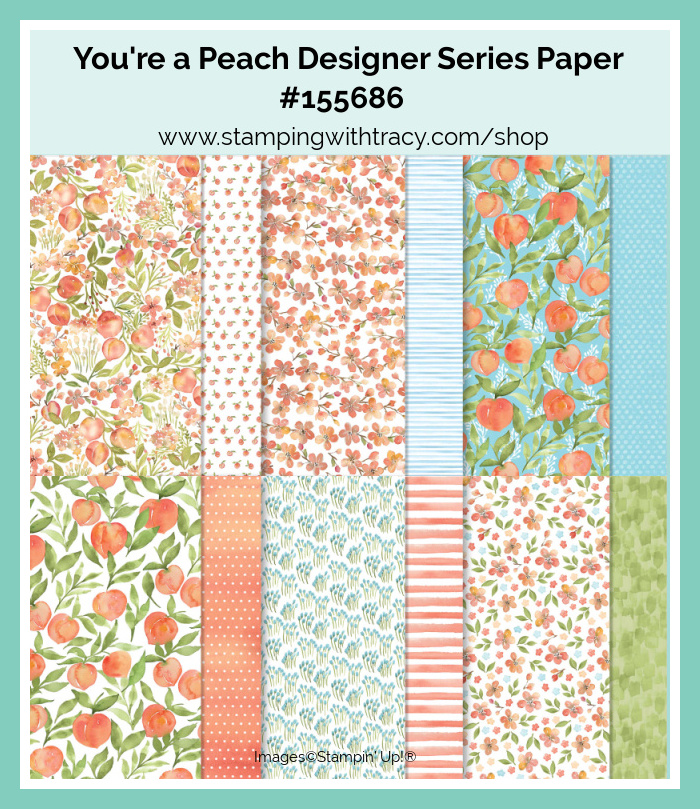
Today’s Friday tutorial features Stampin’ Up! You’re a Peach Designer Series Paper (you’ll use your scraps), the stamp set, Celebrate with Flowers, and the Hippo & Friends Dies. If this card looks like it’s difficult to make, it really isn’t and it’s a great way to use up all those scraps we all have lying around! You can find your free tutorial below the Supply List.


Supply List
Below you’ll find all the Stampin’ Up! supplies I used for today’s card. If you need any stamping supplies, I’d love to be your demonstrator! You can place an order by clicking any of the images below to go to my Stampin’ Up! online store.
Please note: In the tutorial, I mention that you’ll need a strong adhesive so I’ve included three different options in the Supply List.

Paper Pumpkin
Gifts Galore Paper Pumpkin Kit
- Kit contains enough supplies to create nine treat packages—three each of three designs—and nine food-safe bags.
- This all-inclusive kit includes printed die cuts, die-cut boxes, cellophane treat bags, adhesive, and more!
- Includes an exclusive stamp set and a Classic Stampin’ Spot
- Coordinating colors: Evening Evergreen, Flirty Flamingo, Old Olive, Pool Party, Poppy Parade
- Subscribe by November 10, 2021
Click here to order Paper Pumpkin
You can cancel at any time or even skip a month
Have a wonderful weekend!
by Tracy | Oct 13, 2021 | Designer Series Paper, Die-Cutting, Embossing Folders
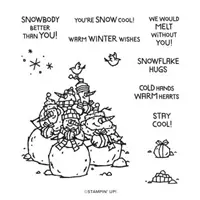
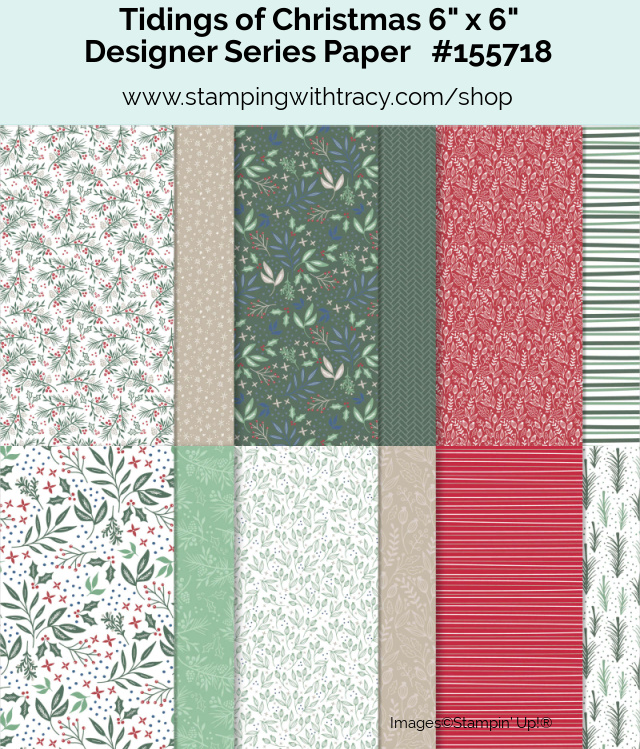
Today’s card features Tidings of Christmas 6″ x 6″ Designer Series Paper, the Wintry 3D Embossing Folders and the Snowbody Better stamp set.
Low Inventory/Backorder Update: Tidings of Christmas Designer Series Paper has been on the Low Inventory List for about a week now and could go into backorder status any day. If you’d like a package, I recommend getting it just as soon as you can!
Whimsy & Wonder 12″ x 12″ Designer Series Paper and Peaceful Place 12″ x 12″ Designer Series Paper were on backorder but both are now in stock. This could change at any time. Stampin’ Up!, just like all companies these days, is feeling the effects of global shipping delays. They are doing everything they can to keep Stampin’ Up! products available.
Back to today’s card!

To create today’s card, I started with a base of Thick Basic White cardstock. Then I added a piece of Tidings of Christmas Designer Series Paper towards the bottom of the card front.

Then I layered pieces of Evening Evergreen and Soft Succulent cardstock together. These are colors I do not normally gravitate towards but they are so beautiful with our Designer Series Paper and so pretty together! I cut two pieces of Evening Evergreen cardstock (you can find the measurements I used below the Supply List) and then ran them through one of the Wintry 3D Embossing Folders. I also cut two pieces of Tidings of Christmas Designer Series Paper and adhered all four pieces to the Soft Succulent cardstock. I added Stampin’ Dimensionals to the back of the Evening Evergreen cardstock and adhered it to the card front.
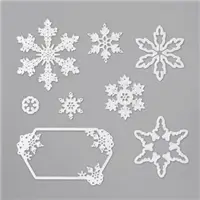
I cut a snowflake out of our Silver Foil 12″ x 12″ Specialty Paper using the So Many Snowflakes Dies. I added very small drops of Multipurpose Glue to the back of the snowflake and adhered it to the front of the card. Another option would be to use our Adhesive Sheets. Simply cut a piece of the adhesive sheet the size of the snowflake, take the backing off of the adhesive sheet and adhere the sticky part to the back of the Silver Foil. After you’ve cut out the snowflake, peel the backing off and the adhesive will be on the back of the snowflake! Easy!

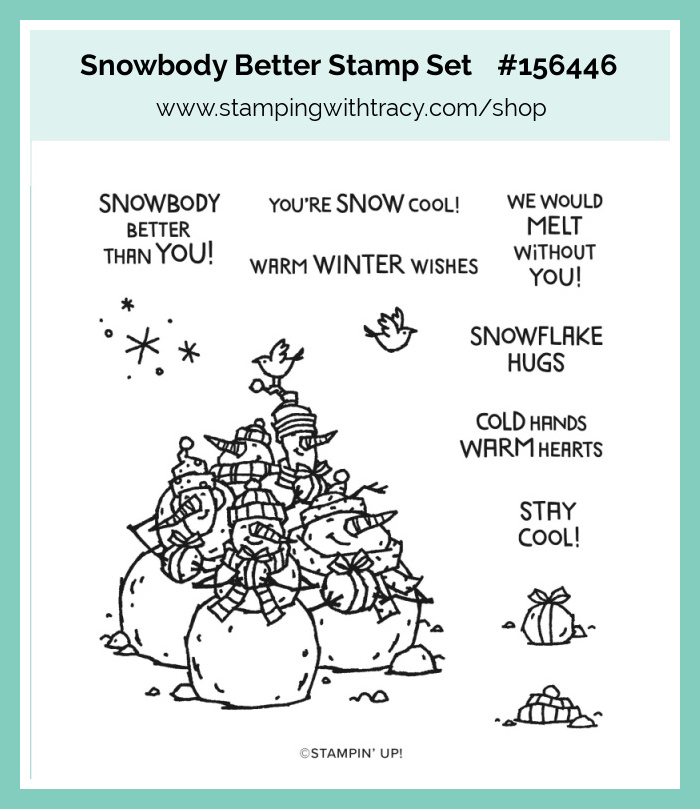
To complete the card, I stamped the sentiment onto a piece of Soft Succulent cardstock in Evening Evergreen ink using the stamp set, Snowbody Better. Ninety-Nine percent of the time, I stamp my sentiments onto Basic White cardstock which I did for this card but thought it looked a bit harsh so I opted for the Soft Succulent. I added Stampin’ Dimensionals to the back and adhered it to the front of the card. After I had already adhered the snowflake to the front, I wished I had placed it a little bit higher so that when I placed the sentiment, you could see the separation between the Designer Series Paper and the embossed Evening Evergreen square. If you make this card, you might want to see which way you like it better.
Supply List
Below you’ll find all the Stampin’ Up! supplies I used for today’s card. If you need any stamping supplies, I’d love to be your demonstrator! You can place an order by clicking any of the images below to go to my Stampin’ Up! online store.
The Specialty Plate is used with 3D Embossing Folders.
Measurements
- Thick Basic White cardstock: 11″ x 4-1/4″ score at 5-1/2″ or 8 1/2″ x 5-1/2″ score at 4-1/4″ (the only difference is how the card opens)
- Evening Evergreen cardstock: 4″ x 3″
- Evening Evergreen cardstock: (2) 1-1/4″ x 1-1/4″
- Soft Succulent cardstock: 3-3/4″ x 2-3/4″
- Soft Succulent cardstock: 2-1/2″ x 1/2″ (sentiment)
- Tidings of Christmas Designer Series Paper: (2) 2-1/4″ x 1-1/4″
- Tidings of Christmas Designer Series Paper: 4″ x 2-1/2″
- Silver Foil: scrap for snowflake
Customer Rewards
All orders over $18.00 receive at least two of my complimentary card kits. Each kit includes all the paper you’ll need to create a beautiful card. The paper will be cut, scored and die cut for you. You’ll just need to supply your own stamp set, ink and adhesive. Use my current host code and you’ll receive an extra card kit (this host code changes monthly and can always be found on the sidebar of my blog).
Gifts Galore Paper Pumpkin Kit
- Kit contains enough supplies to create nine treat packages—three each of three designs—and nine food-safe bags.
- This all-inclusive kit includes printed die cuts, die-cut boxes, cellophane treat bags, adhesive, and more!
- Includes an exclusive stamp set and a Classic Stampin’ Spot
- Coordinating colors: Evening Evergreen, Flirty Flamingo, Old Olive, Pool Party, Poppy Parade
Click here to order Paper Pumpkin
You can cancel at any time or even skip a month
Clearance Rack
The Clearance Rack was refreshed last week. All products are while supplies last! Click here to shop the Clearance Rack. 
Enjoy your day!
by Tracy | Oct 11, 2021 | Designer Series Paper, Die-Cutting, Embossing Folders, Punches, Rectangle Stitched Dies
Today’s card features the stamp set Perfectly Plaid, the Pine Tree Punch, the Wintry 3D Embossing Folders and Painted Christmas Designer Series Paper.

I began with a base of Early Espresso cardstock (all the measurements I used can be found below the Supply List) and then added a layer of Evening Evergreen cardstock. Then I added two squares of Painted Christmas Designer Series Paper.


I embossed a piece of Basic White cardstock using one of the Wintry 3D Embossing Folders and then layered it onto a piece of Early Espresso cardstock. I added Stampin’ Dimensionals to the back and adhered it to the front of the card.

I used the Perfectly Plaid stamp set to stamp two trees in Evening Evergreen ink. The tree in the forefront was stamped onto a piece of scrap paper and then stamped onto my Basic White cardstock. The darker tree was adhered using Multipurpse Liquid Glue and the other tree has a Stampin’ Dimensionals on the back. The sentiment was stamped in Early Espresso ink and cut out using the Stitched Rectangles Dies. I added Stampin’ Dimensionals to the back and adhered it below the trees.


To complete my card, I added two Rhinestone Basic Jewels.
Supply List
Below you’ll find all the Stampin’ Up! supplies I used for today’s card. If you need any stamping supplies, I’d love to be your demonstrator! You can place an order by clicking any of the images below to go to my Stampin’ Up! online store.
The Specialty Plate is used with 3D Embossing Folders.
Measurements
- Early Espresso cardstock: 11″ x 4-1/4″ score at 5-1/2″
- Early Espresso cardstock: 4″ x 2-1/2″
- Evening Evergreen cardstock: 5-1/4″ x 4″
- Painted Christmas Designer Series Paper: (2) 2-1/2″ x 2-1/2″
- Basic White cardstock: 5-1/4″ x 4 (inside card)
- Basic White cardstock: 3-3/4″ x 2-1/4″ (embossed piece)
- Basic White cardstock: scraps for trees
- Basic White cardstock: approx. 3″ x 1″
Encircled in Warmth Card Sampler


Tomorrow is the last day my Encircled in Warmth Card Sampler will be available. For all the details, please click here.
Enjoy your day!
by Tracy | Oct 8, 2021 | Card Sampler, Designer Series Paper, Die-Cutting, Embossing Folders, Free Tutorial
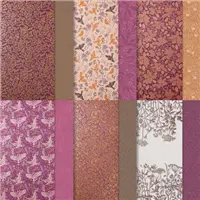
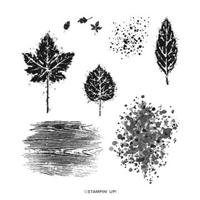
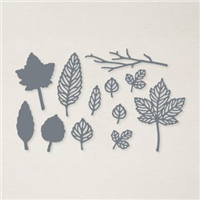
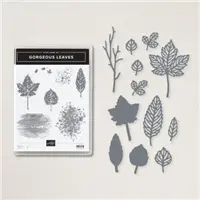
Happy Friday! Today my free tutorial features Blackberry Beauty Designer Series Paper, the stamp set Banner Year and the Gorgeous Leaves Bundle which includes the Gorgeous Leaves stamp set and the Intricate Leaves Dies (bundles save you 10%).
Blackberry Beauty Designer Series Paper has been on backorder and it’s now back in stock BUT it’s in Low Inventory Status so if you’ve been waiting for it, grab it just as soon as you can! You can purchase it HERE.

You can access your free tutorial below the Supply List.
Supply List
Below you’ll find all the Stampin’ Up! supplies I used for today’s card. If you need any stamping supplies, I’d love to be your demonstrator! You can place an order by clicking any of the images below to go to my Stampin’ Up! online store.
The Specialty Plate is used with 3D Embossing Folders.
Encircled in Warmth Card Sampler
My Card Samplers give you the chance to “sample” different products. You are able to see our Designer Series Paper, cardstock, embossed paper, die cuts and embellishments “in person” as you assemble the cards.
Here’s how you can earn it FREE!
- Place a minimum $50 order (before tax/shipping) at my Stampin’ Up! online store.
- Use my special Encircled in Warmth Card Sampler Host Code when placing your order: JQXN2RHG
- Place your order on or before Tuesday, October 12, 2021.
- If your order reaches $150 or more, please DO NOT use the host code so you can receive Stampin’ Rewards (free product directly from Stampin’ Up!). Once you place your order, simply drop me an email (only necessary if your order is over $150) letting me know that you’d like the Encircled in Warmth Card Sampler. If I don’t hear from you, I’ll assume you’d prefer to receive my regular card kits.
Click here for all the details
Click here to place an order
October Paper Pumpkin – Last Day to Order is Sunday, October 10th

Enjoy your weekend!
by Tracy | Oct 4, 2021 | Designer Series Paper, Tasteful Labels Dies
Thanks so much for all the comments left over the weekend! It was so much fun reading every single one of them. Tomorrow I’ll announce the winner of the stamp set!
I really enjoy finding a card design I like and then trying it out with different Designer Series Papers. Today’s card is one of those designs and was created using Blackberry Beauty Designer Series Paper. You can see another version of the card HERE using Beauty of the Earth Designer Series Paper.
Blackberry Beauty Designer Series Paper has been on backorder but is estimated to be back in stock sometime this week.

I started with a piece of Thick Basic White cardstock. I adhered six pieces of Blackberry Beauty Designer Series Paper (you can find the measurements I used below the Supply List) to a piece of Blackberry Bliss cardstock, added Stampin’ Dimensionals to the back and adhered it to the front of the card.

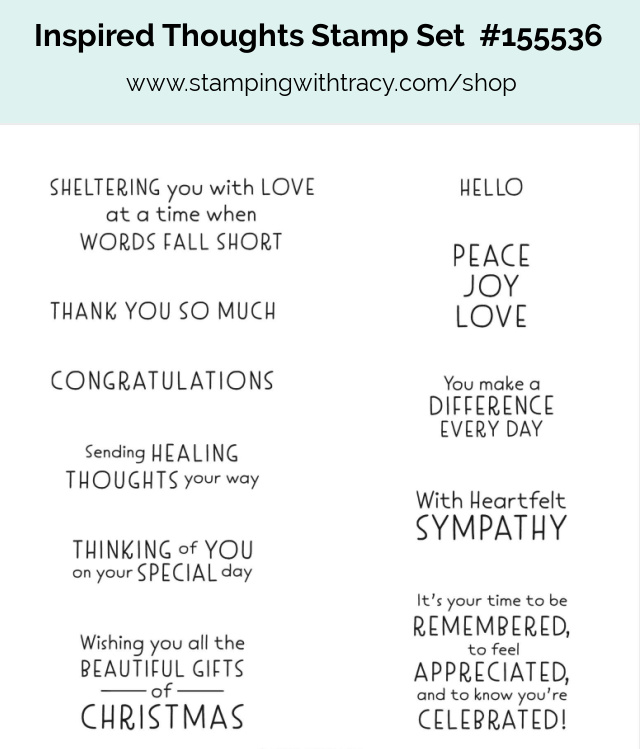
Using the Tasteful Labels Dies, I cut the sentiment shape out of Basic White cardstock. I stamped the sentiment using the stamp set, Inspired Thoughts, and Blackberry Bliss ink. I added Stampin’ Dimensionals to the back and adhered it to the front of the card. How’s that for a quick and easy card?

Supply List
Below you’ll find all the Stampin’ Up! supplies I used for today’s card. If you need any stamping supplies, I’d love to be your demonstrator! You can place an order by clicking any of the images below to go to my Stampin’ Up! online store.
Measurements
- Thick Basic White cardstock: 11″ x 4-1/4″ score at 5-1/2″
- Blackberry Bliss cardstock: 5″ x 3-3/8″
- Blackberry Beauty Designer Series Paper: (6) 1-1/2″ x 1-1/2″
- Basic White cardstock: scrap for sentiment
October Paper Pumpkin
Peaceful Christmas
- The kit contains enough elements to create 10 Christmas cards—5 each of 2 designs—and coordinating envelopes. This all-inclusive kit includes printed card bases, die-cut paper pieces, embellishments, adhesive, and more!
- October’s kit arrives in a cute collectible box covered with enchanting evergreen trees. Use this special, limited-edition box to store your holiday handicrafts, or transform it into a well-wrapped package for a present!
- The kit’s contents pair perfectly with the Peaceful Place Suite Collection (item 156277). To continue your Christmas crafting, combine the kit’s components with the suite’s patterned paper, shimmery sequins, and more!
- Card size: 4-1/4″ x 5-1/2″
- Envelope size: 4-1/2″ x 5-3/4″
- Coordinating colors: Basic Gray, Real Red, Shaded Spruce, silver foil
Click here to subscribe today
You can cancel at any time or even skip a month
Enjoy your day!