Today’s the last day to receive my Fun Folds Card Sampler, FREE, with a minimum $50 Stampin’ Up! purchase using the host code 6QQTDKMY.
You’ll receive six card kits (2 each of three different designs) with envelopes and a PDF Tutorial with instructions, pictures and a supply list. You’ll receive all the paper and embellishments needed to make the cards and all the paper will be cut, scored and die cut for you (you’ll need to supply your own adhesive, ink and stamp set). If your order is $150 or more, please do not use the host code so you can earn Stampin’ Rewards (free product) directly from Stampin’ Up! After placing your order, please contact me to let me know you’d like the Fun Folds Card Sampler (you only need to contact me if your order is $150 or more). If I don’t hear from you, I’ll assume you’d like my regular card kits. The last day this offer will be available is TODAY, Monday, August 30, 2021. For all the details, please click here.
Ever wonder how Stampin’ Up! manufactures their red rubber stamps? In the video below, a concept artist at Stampin’ Up! briefly explains the manufacturing process of our red rubber stamps and some tips on how to get the best results possible when stamping detailed red rubber stamp images, such as the Sale-a-Bration stamp set, Feels Like Home, free with a $50 purchase.
Stampin’ Up! Starter Kit
Sale-a-Bration is the perfect time to purchase the no risk Starter Kit. You’ll receive $125 worth of product for just $99 plus you can choose one FREE bundle (there are twelve to choose from – see below) and the Starter Kit always ships free!! Once you purchase the kit, you’ll start receiving a 20% discount on everything you purchase (who doesn’t like a discount?).It’s up to you whether you want this to be a business or if you just want to purchase for yourself. Whatever you decide, I’m here to support you in any way I can.
How Do I Purchase the Starter Kit?
Grab a catalog (or look online) and choose $125 worth of Stampin’ Up! products you’d like.
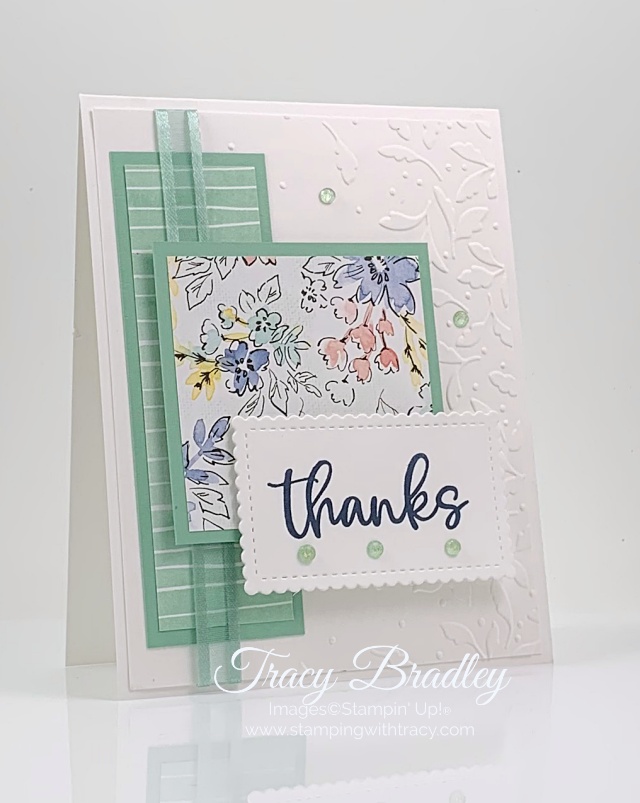
Today’s card features Hand-Penned Designer Series Paper (currently on the Low Inventory list and could go into backorder status), one of the Meadow Moments Embossing Folders and our Stitched So Sweetly Dies. I made this card as part of a challenge and it went a little bit out of my comfort zone because of the different layers. When I completed the card, I was happy with it and made it my FREE PDF Tutorial. You can access the tutorial below the Supply List.
Supply List
Below you’ll find all the Stampin’ Up! supplies I used for today’s card. If you need any stamping supplies, I’d love to be your demonstrator! You can place an order by clicking any of the images below to go to my Stampin’ Up! online store.
My Card Samplers give you the chance to “sample” different products. You are able to see our Designer Series Paper, cardstock, embossed paper, die cuts and embellishments “in person” as you assemble the cards.
Place a minimum $50 order (before shipping/tax) at my Stampin’ Up! online store using the host code 6QQTDKMY and as a thank you, you’ll receive my Fun Folds Card Sampler which includes 6 card kits (2 each of three different designs) with envelopes and a PDF Tutorial with instructions, pictures and a supply list. You’ll receive all the paper and embellishments needed to make the cards and all the paper will be cut, scored and die cut for you (you’ll need to supply your own adhesive, ink and stamp set). If your order is $150 or more, please do not use the host code so you can earn Stampin’ Rewards (free product) directly from Stampin’ Up! After placing your order, please contact me to let me know you’d like the Fun Folds Card Sampler (you only need to contact me if your order is $150 or more). If I don’t hear from you, I’ll assume you’d like my regular card kits. The last day this offer will be available is Monday, August 30, 2021. For all the details, please click here.
You’ll also earn at least one Sale-a-Bration gift from Stampin’ Up!
If my Card Sampler doesn’t appeal to you, use the host code below to receive an extra card kit. All orders, $18.00 or more receive at least two of my card kits along with a PDF Tutorial. Click here for more information (please note: this is completely separate from my Card Sampler).
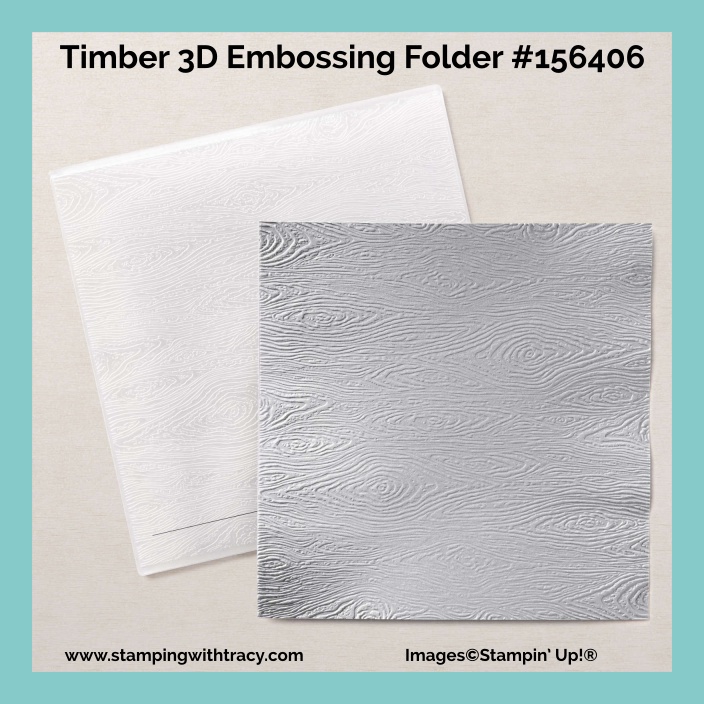
I started with a piece of Coastal Cabana cardstock for the base of my card and then added a layer of Basic White cardstock that I embossed using the Timber 3D Embossing Folder.
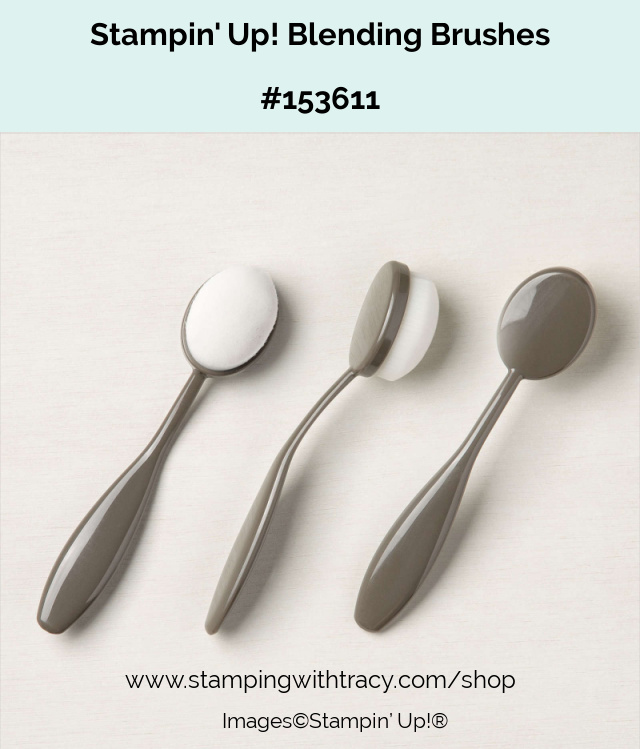
Then, using Basic White cardstock and our Blending Brushes, I covered my paper with Just Jade ink. When I had the shade I wanted, I blended Pool Party ink and then a small amount of Pacific Point ink. As I mentioned in Monday’s post, after getting ink on my Blending Brush, I start by moving the brush in a circular motion on my grid paper and then without lifting the brush, continue on to my Basic White cardstock. This will help to prevent blotches of color.
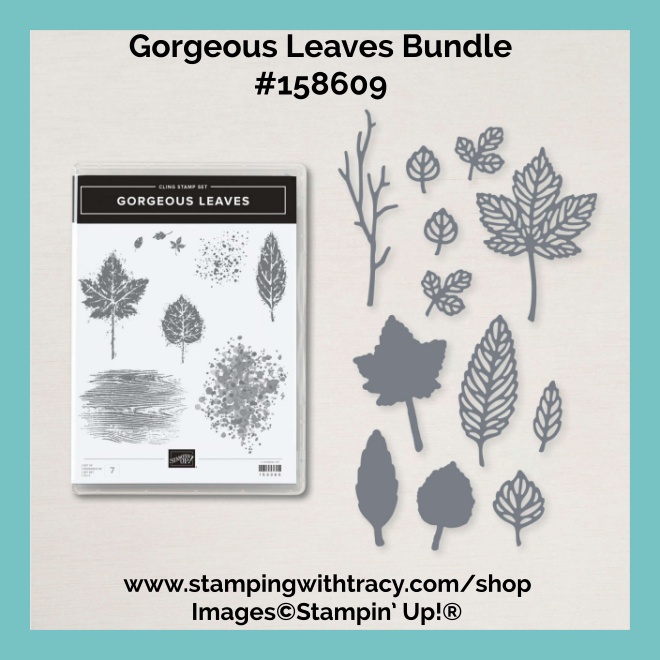
I cut the paper down to 4-3/4″ x 2″ and then using Memento Ink, stamped leaves using the Gorgeous Leaves stamp set. Then I adhered it to a piece of Coastal Cabana cardstock, added Stampin’ Dimensionals to the back and adhered it to the front of the card.
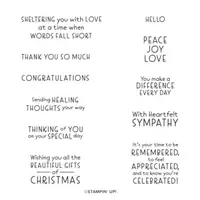
I used the stamp set Pansy Patch to stamp the sentiment in Memento Ink onto a piece of Basic White cardstock. This is a photopolymer stamp set and I CUT the stamp in half so it would fit on my circle. Now my stamp is more versatile and it was easy to cut with our Paper Snips. I cut the sentiment out using our Tasteful Labels Dies. I used the Layering Circles Dies to cut a larger circle out of Coastal Cabana and then layered the two pieces together. On the back, I added Stampin’ Dimensionals to the right side only and then adhered it to the card front. To complete the card, I added three Holiday Rhinestones.
Supply List
Below you’ll find all the Stampin’ Up! supplies I used for today’s card. If you need any stamping supplies, I’d love to be your demonstrator! You can place an order by clicking any of the images below to go to my Stampin’ Up! online store.
The Specialty Plate is used with 3D Embossing Folders.
Coastal Cabana cardstock: 11″ x 4-1/4″ score at 5-1/2″
Coastal Cabana cardstock: 5″ x 2-1/4″
Coastal Cabana cardstock: scrap for circle
Basic White cardstock: (3) 5-1/4″ x 4″ (one piece for the inside, one piece for the front of the card, one piece for blending and it will be cut down to 4-3/4″ x 2″
Basic White cardstock: scrap for sentiment
Fun Folds Card Sampler
My Card Samplers give you the chance to “sample” different products. You are able to see our Designer Series Paper, cardstock, embossed paper, die cuts and embellishments “in person” as you assemble the cards.
Place a minimum $50 order (before shipping/tax) at my Stampin’ Up! online store using the host code 6QQTDKMY and as a thank you, you’ll receive my Fun Folds Card Sampler which includes 6 card kits (2 each of three different designs) with envelopes and a PDF Tutorial with instructions, pictures and a supply list. You’ll receive all the paper and embellishments needed to make the cards and all the paper will be cut, scored and die cut for you (you’ll need to supply your own adhesive, ink and stamp set). If your order is $150 or more, please do not use the host code so you can earn Stampin’ Rewards (free product) directly from Stampin’ Up! After placing your order, please contact me to let me know you’d like the Fun Folds Card Sampler (you only need to contact me if your order is $150 or more). If I don’t hear from you, I’ll assume you’d like my regular card kits. The last day this offer will be available is Monday, August 30, 2021. For all the details, please click here.
You’ll also earn at least one Sale-a-Bration gift from Stampin’ Up!
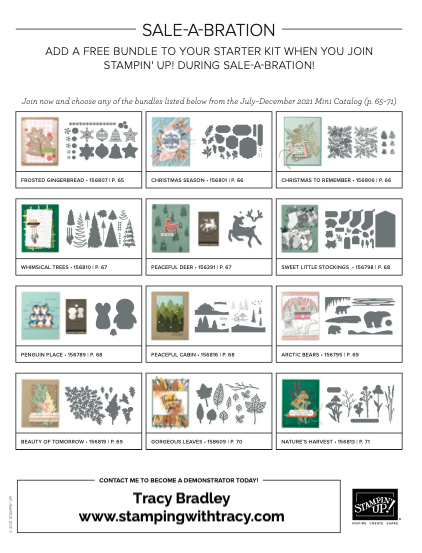
Choose one of twelve bundles to add to your Starter Kit, absolutely FREE! If you’re planning to make a $99 Stampin’ Up! purchase, you may want to consider the Starter Kit. When you purchase the $99 Starter Kit you can then choose $125 worth of Stampin’ Up! product from any current catalog PLUS, during Sale-a-Bration you can choose a FREE bundle from those listed below. The Starter Kit always ships FREE and once you purchase it you will start receiving a 20% discount on your future purchases. You can purchase just for yourself or start your own business, it’s totally up to you. Purchasing the Starter Kit is absolutely risk free! If you’d like more information, please click here. If you’re ready right now to purchase the Starter Kit, click here! As always, if you have questions, don’t hesitate to contact me!
My Fun Folds Card Sampler is now available but only for a limited time!
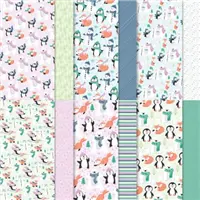
My Card Samplers give you the chance to “sample” different products. You are able to see our Designer Series Paper, cardstock, embossed paper, die cuts and embellishments “in person” as you assemble the cards. The featured Designer Series Papers are: Blackberry Beauty, Expressions in Ink and Penguin Playmates (Penguin Playmates is one of the FREE Sale-a-Bration choices with a $50 order).
Use my special Fun Folds Card Sampler Host Code when placing your order: 6QQTDKMY
Place your order on or before Monday, August 30, 2021.
If your order reaches $150 or more, please DO NOT use the host code so you can receive Stampin’ Rewards (free product directly from Stampin’ Up!). Once you place your order, simply drop me an email (only necessary if your order is over $150) letting me know that you’d like the Fun Folds Card Sampler. If I don’t hear from you, I’ll assume you’d prefer to receive my regular card kits.
Here’s What You’ll Receive:
All the paper and embellishments needed to make six cards (two each of three different designs). The paper will be cut, scored, embossed and die cut for you! You’ll need to supply your own adhesive, ink and stamp set (per Stampin’ Up! I cannot send stamped images). Envelopes will also be provided.
A PDF Tutorial with instructions, pictures, cutting measurements and a complete supply list of all the products used.
Earn at least one Bradley Point (earn ten Bradley Points and redeem them for free product).
You’ll also earn at least one Sale-a-Bration gift directly from Stampin’ Up!
All the Other Important Information:
Your Fun Folds Card Sampler will ship first-class mail on or before Thursday, September 9, 2021 and will be mailed to the address used on your online order.
You’ll receive an email when I mail your Card Sampler. The PDF Tutorial will be included in that email.
When using the Fun Folds Card Sampler Host Code to place your order, you will not qualify for my regular Customer Rewards Card Kits.
Per Stampin’ Up! policy, kits can only be mailed within the United States.
Limit 1 per person
The special Fun Folds Card Sampler HOST CODE will close at the end of the day on Monday, August 30, 2021 and after that date, the Card Sampler will no longer be available.
Expected ship date of the Card Sampler is September 9, 2021.
Listed below are the supplies you’ll need to complete the cards exactly as shown(or you can use what you already own). Simply click any of the products and you’ll be taken to my Stampin’ Up! online store. When placing your order, don’t forget to use the special Fun Folds Card Sampler Host Code(please do not use host code if your order is over $150 – see above).
For every $50 or $100 purchase, choose a Sale-a-Bration gift!
Earn one of the items below with every $50 purchase
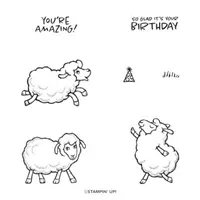
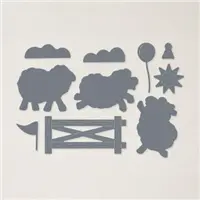
During this round of Sale-a-Bration, some products are only available while supplies last. In the $50 category the products are: Be Dazzling 6″ x 6″ Specialty Paper and the Sheep Dies.
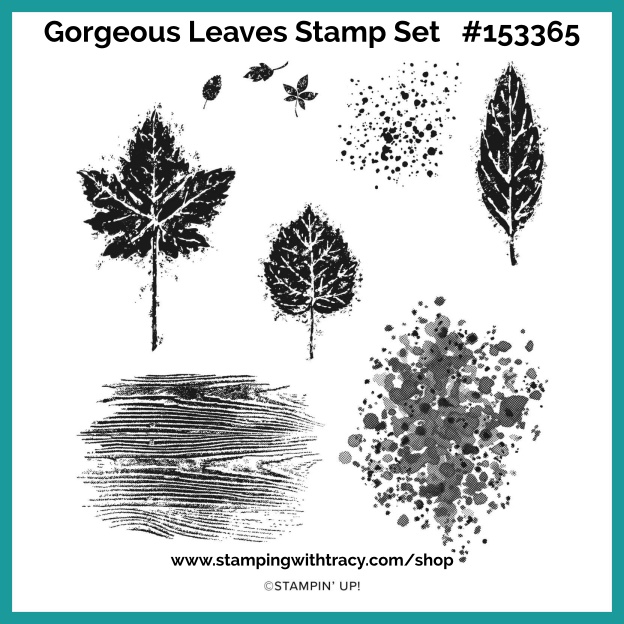
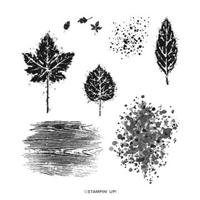
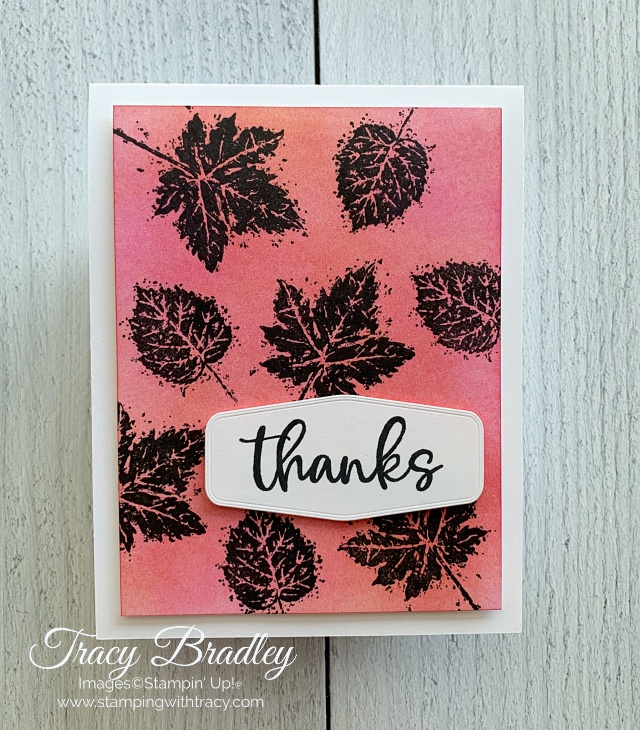
Today’s card features the Stampin’ Up! Gorgeous Leaves stamp set and our Blending Brushes. If you haven’t tried using our Blending Brushes, they make it so easy to make a beautiful background. Not only will you have a one of a kind background, but it’s really relaxing too!
I started with a piece of Thick Basic White cardstock for the base of my card. Next, I used one of our Blending Brushes to pick up Magenta Madness ink and blend it over the paper until I had the shade I wanted. Then, using another Blending Brush, I lightly blended Daffodil Delight ink over the top.
Tip: After picking up the ink on the brush, brush the ink over your grid paperbefore applying it to the Basic White cardstock. If you pick up the ink and directly start blending on your Basic White, you’ll get blotches of color. I pick up the color and then blend in a circular motion on the grid paper and then, without picking up the blending brush, continue onto my paper.
After getting the color I wanted, I used the Gorgeous Leaves stamp set to stamp two different leaves in Memento Ink. I added Stampin’ Dimensionals to the back and adhered it to the card front.
The sentiment was stamped onto a piece of Basic White cardstock in Memento Ink using the stamp set, Biggest Wish and was cut out using the Tasteful Labels Dies. Stampin’ Dimensionals were added to the back of the sentiment before it was adhered to the card front
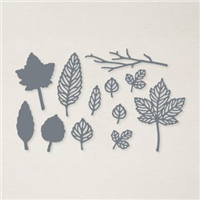
Bundle Alert(save 10%): The Gorgeous Leaves Bundle #158609, includes the Gorgeous Leaves stamp set and the Intricate Leaves Dies.
Supply List
Below you’ll find all the Stampin’ Up! supplies I used for today’s card. If you need any stamping supplies, I’d love to be your demonstrator! You can place an order by clicking any of the images below to go to my Stampin’ Up! online store.
You can access your free tutorial below the Supply List!
Supply List
Below you’ll find all the Stampin’ Up! supplies I used for today’s card. If you need any stamping supplies, I’d love to be your demonstrator! You can place an order by clicking any of the images below to go to my Stampin’ Up! online store
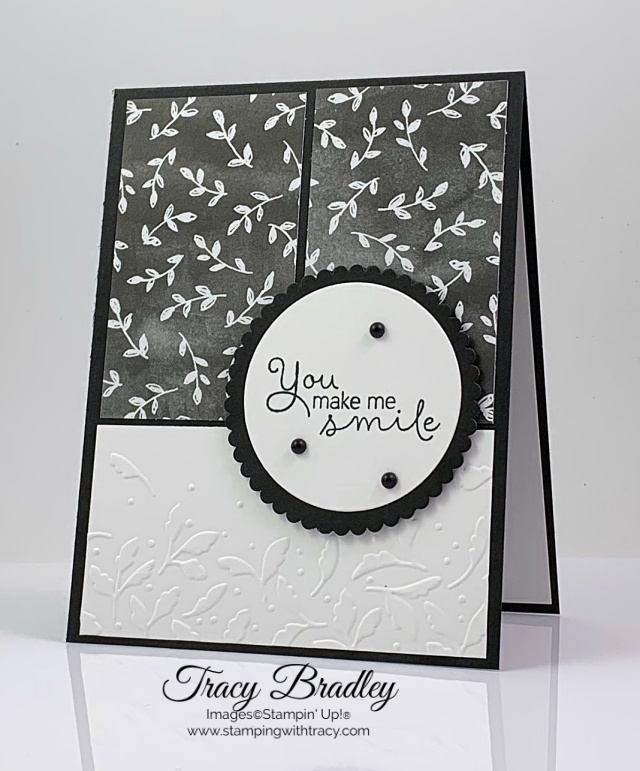
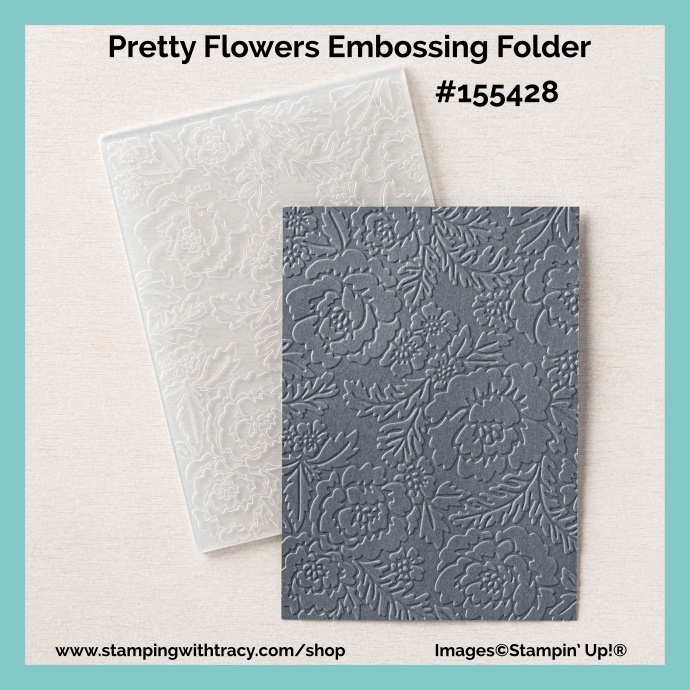
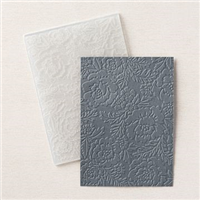
To create my card, I started with a piece of Coastal Cabana cardstock and then added a layer of Basic White cardstock that I embossed using the Pretty Flowers Embossing Folder.
I stamped the sentiment onto a piece of Basic White cardstock and then cut it out using the Layering Circles Dies. I then cut a larger scalloped circle out of Coastal Cabana and adhered the sentiment to the front. I added Stampin’ Dimensionals to the back and adhered it to the front of the card.
To complete the card, I added a piece of Basic White cardstock to the inside of the card and added five Elegant Faceted Gems to the front.
Supply List
Below you’ll find all the Stampin’ Up! supplies I used for today’s card. If you need any stamping supplies, I’d love to be your demonstrator! You can place an order by clicking any of the images below to go to my Stampin’ Up! online store.
Coastal Cabana cardstock: 11″ x 4-1/4″ score @ 5-1/2″ OR 8-1/2″ x 5-1/2″ score @ 4-1/4″
Coastal Cabana cardstock: approx. 3-1/4″ x 3-1/4″
Basic White cardstock (inside card): 5-1/4″ x 4″
Basic White cardstock: 5-1/4″ x 4″
Basic White cardstock (sentiment): approx. 2-3/4″ x 2-3/4″
Choose a FREE Sale-a-Bration product with every $50 or $100 you spend (before tax and shipping!)
Earn one of the items below with every $50 purchase
During this round of Sale-a-Bration, some products are only available while supplies last. In the $50 category the products are: Be Dazzling 6″ x 6″ Specialty Paper and the Sheep Dies.
If you’re planning to make a $99 Stampin’ Up! purchase, you may want to consider the Starter Kit. When you purchase the $99 Starter Kit you can then choose $125 worth of Stampin’ Up! product from any current catalog PLUS, during Sale-a-Bration you can also choose a FREE bundle from those listed below. The Starter Kit always ships FREE and once you purchase it you will start receiving a 20% discount on your future purchases. You can purchase just for yourself or start your own business, it’s totally up to you. Purchasing the Starter Kit is absolutely risk free! If you’d like more information, please click here. If you’re ready right now to purchase the Starter Kit, click here! As always, if you have questions, don’t hesitate to contact me!
Click the image below to download the flyer of all the bundles you can choose from or click HERE.
Haunts & Harvest Paper Pumpkin Kit
Kit contains enough supplies to create 12 treat packages—4 each of 3 designs. The all-inclusive kit includes printed die-cut boxes, die-cut sheets, adhesive, and more!
Finished treat box size: 2-1/2″ x 2″
Includes an exclusive stamp set and a Classic Stampin’ Spot
I started with a piece of Thick Basic White cardstock and then added a layer of Cajun Craze cardstock that I embossed using the Timber 3D Embossing Folder. Next, I added a square of Basic White cardstock that I embossed with the Timber 3D Embossing Folder onto a square of Bumblebee cardstock, added Stampin’ Dimensionals to the back and adhered it to the card front.
I cut two leaves using the Intricate Leaves Dies out of Cajun Craze cardstock and Bumblebee cardstock. Down near the uppermost part of the stem, I added a Mini Glue Dot between the leaves to secure them together. Then I added one to the back and adhered it to the front of the card. I made a bow using two pieces of Crumb Cake Baker’s Twine (you can find this in the Baker’s Twine Essentials Pack). I added a Mini Glue Dot to the back (rolled into a ball) and adhered the bow to the leaves.
The sentiment was stamped onto a Basic White scalloped circle that was cut out using the Tasteful Labels Dies. It was stamped in Cajun Craze ink using the stamp set, Biggest Wish. I added adhesive to the upper part of the circle and adhered it to the lower bottom right corner of the small square. To complete the card I added three Holiday Rhinestones.
Supply List
Below you’ll find all the Stampin’ Up! supplies I used for today’s card. If you need any stamping supplies, I’d love to be your demonstrator! You can place an order by clicking any of the images below to go to my Stampin’ Up! online store.
The Specialty Plate is used with 3D Embossing Folders.
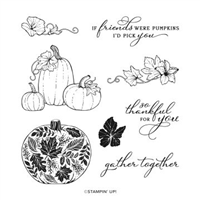
I started with a layer of Pumpkin Pie cardstock and then added a layer of Basic White cardstock that I embossed using the Timber 3D Embossing Folder and the Stampin’ Cut & Emboss Machine. Next, I cut a scalloped rectangle out of Pumpkin Pie cardstock and a smaller one out of Basic White cardstock using the Stitched So Sweetly Dies. I stamped the sentiment from the Pretty Pumpkins stamp set using Memento Ink onto the Basic White rectangle and then adhered it to the Pumpkin Pie rectangle. I added Stampin’ Dimensionals to the back and adhered it to the card front.
I stamped the pumpkins onto a piece of Basic White cardstock using Memento ink and the Pretty Pumpkins stamp set and then colored them using these colors of Stampin’ Blends: Pumpkin Pie, Granny Apple Green and Cinnamon Cider. It was super easy to cut them out with the Detailed Pumpkins Dies. I added Stampin’ Dimensionals to the back and attached it to the Basic White rectangle.
To complete my card, I added a piece of Basic White cardstock to the inside and added three Holiday Rhinestones to the front.
Supply List
Below you’ll find all the Stampin’ Up! supplies I used for today’s card. If you need any stamping supplies, I’d love to be your demonstrator! You can place an order by clicking any of the images below to go to my Stampin’ Up! online store.
The Specialty Plate is used with 3D Embossing Folders.
Pumpkin Pie cardstock (stitched rectangle): approx. 4-1/4″ x 3-1/8″
Basic White cardstock (includes piece for inside the card): (2) 5-1/4″ x 4″
Basic White cardstock (stitched rectangle): approx. 3-3/4″ x 2 5/8″
Basic White cardstock: scrap for pumpkins
Earn one of the items below with every $50 purchase
During this round of Sale-a-Bration, some products are only available while supplies last. In the $50 category the products are: Be Dazzling 6″ x 6″ Specialty Paper and the Sheep Dies.
Today’s Free Friday Tutorial is for a card I shared several weeks ago before the start of Sale-a-Bration. I created it using a FREE set of dies, the Summer Shadows Dies, that can be earned with a $100 Stampin’ Up! purchase and they coordinate with the stamp set, Shaded Summer in the Annual Catalog (this stamp set was on backorder but it’s now back in stock). Several Sale-a-Bration items are only available while supplies last and the Summer Shadows Dies are one of those products. Get your set while they’re still available!
You can find your free tutorial below the Supply List!
Supply List
Below you’ll find all the Stampin’ Up! supplies I used for today’s card. If you need any stamping supplies, I’d love to be your demonstrator! You can place an order by clicking any of the images below to go to my Stampin’ Up! online store.
Choose one of these FREE products with every $50 Purchase During Sale-a-Bration!
During this round of Sale-a-Bration, some products are only available while supplies last. In the $50 category those products are: Be Dazzling 6″ x 6″ Specialty Paper and the Sheep Dies.
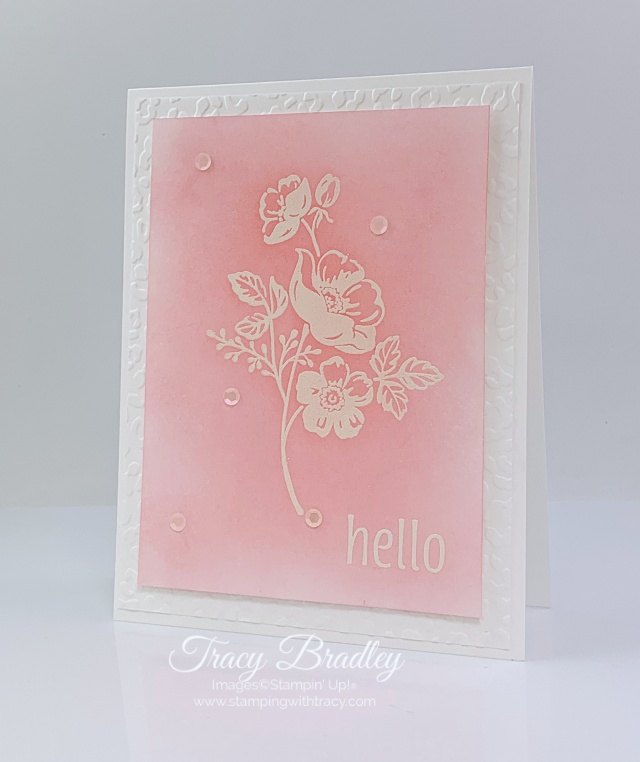
Today’s card was created using our Blending Brushes and the stamp set, Shaded Summer. This stamp set is currently on backorder but is estimated to be back in stock the week of August 23rd. As of today, it can still be added to your cart and when it’s in stock, Stampin’ Up! will mail it to you (the rest of your order will ship as usual).
I started with a base of Thick Basic White cardstock and then added a layer of our regular Basic White cardstock that I embossed using the Animal Print Embossing Folder. Next, I stamped the flowers from Shaded Summer using Versamark ink onto a piece of Basic White cardstock. I then heat embossed the image using white embossing powder from our Basics Embossing Powders set and our Heat Tool (you can find more detailed instructions for embossing farther down in the post). I also heat embossed the sentiment using the stamp set Artistically Inked.
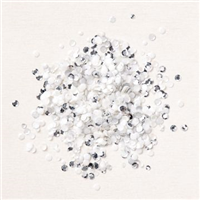
Next, using one of our Blending Brushes, I blended Flirty Flamingo ink over the cardstock until I had the color I wanted. When I was done, I took a soft tissue and wiped over all the embossed parts to take off any ink that might have been sitting on top. To complete the card, I added five of our new Subtle Shimmer Sequins to the card front using Multipurpose Glue. The sequin at the bottom of the stem was added because some of my embossing powder collected there so I hid it with a sequin.
How to Heat Emboss
Prepare your cardstock by rubbing an anti-static pouch (Stampin’ Up! no longer carries this product but it’s a must when embossing) over the surface as it helps keep away stray particles of embossing powder. Stamp your sentiment or image using a Versamark pad. This is very sticky ink and your embossing powder will stick right to it. Sprinkle embossing powder over the stamped image. Shake off any excess. Before applying heat to your paper, heat the Heat Tool first so the paper won’t warp (about 10 seconds). Direct the heat over your image and watch as it’s transformed!
Supply List
Below you’ll find all the Stampin’ Up! supplies I used for today’s card. If you need any stamping supplies, I’d love to be your demonstrator! You can place an order by clicking any of the images below to go to my Stampin’ Up! online store.
Thick Basic White cardstock:11″ x 4-1/4″ score at 5-1/2″ or 8-1/2″ x 5-1/2″ score at 4-1/4″
Basic White cardstock: 5-1/4″ x 4″
Basic White cardstock: 4-3/4″ x 3-1/2″
Sale-a-Bration Starter Kit Promotion
If you’re planning to make a $99 purchase, you might want to consider the Stampin’ Up! Starter Kitbecause you can turn that $99 purchase into $125 in Stampin’ Up! product PLUS during Sale-a-Bration you can choose one of the bundles listed below!! When you purchase the Starter Kit for $99, you’ll be able to choose $125 in Stampin’ Up! product from any current catalog and you’ll choose which bundle you’d like (see below). Plus, the Starter Kit always ships FREE so you won’t be paying for the Starter Kit to be shipped to you. After purchasing the Starter Kit you’ll be able to get your future purchases at a 20% discount.
There’s no risk in signing up! To stay active, the quarterly minimum is $300 in product (which is only $240 after your discount!) that can be from personal orders, online orders or ones from family and friends. The quarters are January – March, April – June, July – September, October – December. Once you join, your quarterly minimum begins during your first FULL quarter so if you join during this promotion, your first minimum will be due at the end of December! If you don’t meet the minimum, you’re simply dropped.
Purchase the Starter Kit to start your own business or to just get your stamping supplies at a discount! It’s up to you!
Sale-a-Bration
September Paper Pumpkin
Haunts & Harvest Paper Pumpkin Kit
Kit contains enough supplies to create 12 treat packages—4 each of 3 designs. The all-inclusive kit includes printed die-cut boxes, die-cut sheets, adhesive, and more!
Finished treat box size: 2-1/2″ x 2″
Includes an exclusive stamp set and a Classic Stampin’ Spot
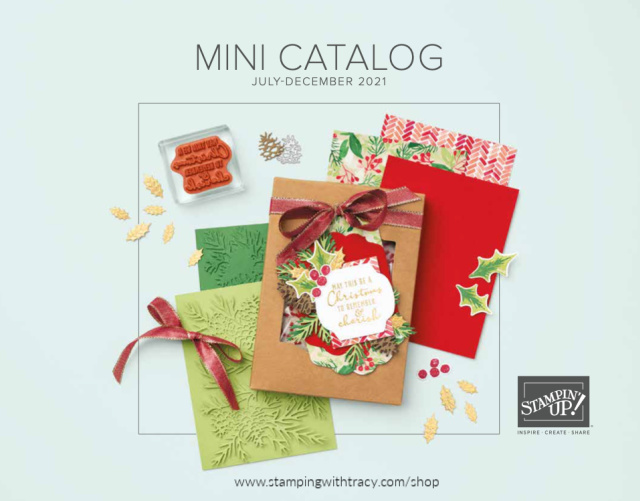
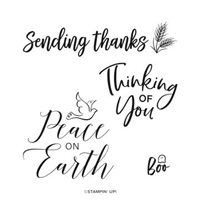
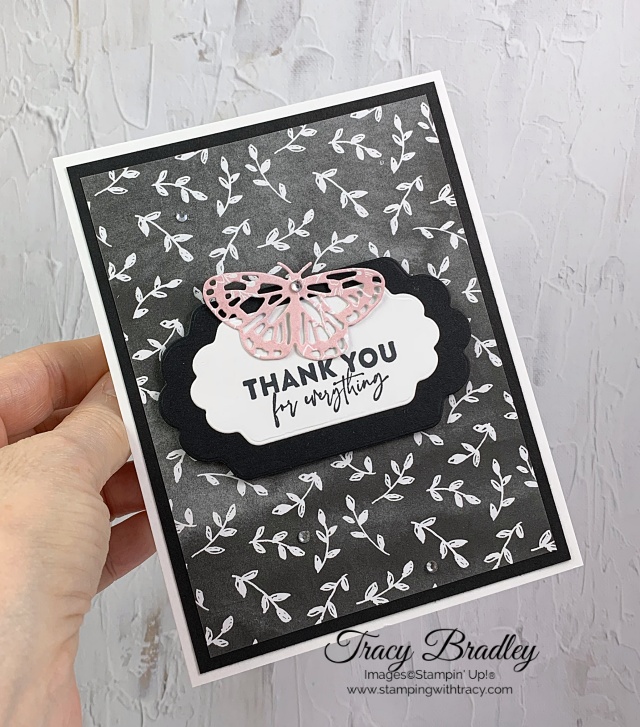
Today’s card features Beautifully Penned Designer Series Paper, one of eight products to choose from with every $50 purchase during Sale-a-Bration (August 3 – September 30, 2021)! Once your order reaches $50, you can add this paper to your cart and it will be absolutely FREE and there’s no limit to how many free items you can earn!
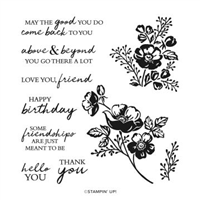
I started with a base of Thick Basic White cardstock and then added a layer of Basic Black cardstock and Beautifully Penned Designer Series Paper. The sentiment was stamped using the stamp set Flowers of Friendship onto Basic White cardstock using Memento Ink and cut out with the Seasonal Labels Dies (as well as the Basic Black shape it’s layered with). These dies are a new product in the Mini Catalog!
Bundle Alert: The Christmas Season Bundle (bundles save you 10%) includes the Seasonal Labels Dies and the Christmas Season stamp set. You can see the Christmas Season Bundle here.
I added Stampin’ Dimensionals to the back of the Basic Black cardstock before adhering it to the card front. Using the Brilliant Wings Dies, I cut a butterfly out of Hand-Penned Designer Series Paper and attached it to the sentiment using Glue Dots in strategic places, rolled up into tiny balls
.
Bundle Alert: The Butterfly Brilliance Bundle (bundles save you 10%) includes the Brilliant Wings Dies and the Butterfly Brilliance stamp set. You can see the Butterfly Brilliance Bundle here.
To complete my card, I added a rhinestone to the center of the butterfly and three more on the card front.
Below you’ll find all the Stampin’ Up! supplies I used for today’s card. If you need any stamping supplies, I’d love to be your demonstrator! You can place an order by clicking any of the images below to go to my Stampin’ Up! online store.
Thick Basic White cardstock: 11″ x 4-1/4″ score @ 5-1/2″
Basic Black cardstock: 5-1/4″ x 4″
Basic Black cardstock: approx 3-1/2″ x 2-1/4″
Basic White cardstock: approx 2-3/4″ x 1-1/2″
Beautifully Penned Designer Series Paper: 5″ x 3-3/4″
Hand-Penned Designer Series Paper: scrap for butterfly
Sale-a-Bration
September Paper Pumpkin
Haunts & Harvest Paper Pumpkin Kit
Kit contains enough supplies to create 12 treat packages—4 each of 3 designs. The all-inclusive kit includes printed die-cut boxes, die-cut sheets, adhesive, and more!
Finished treat box size: 2-1/2″ x 2″
Includes an exclusive stamp set and a Classic Stampin’ Spot