by Tracy | Feb 4, 2020 | Designer Series Paper, Die-Cutting

I have a free PDF Tutorial for you today but first I want to let you know that it’s the first day of the Product Coordination Release. There are five new dies and a package of Designer Series Paper available starting today that coordinate with products from the Mini & Sale-a-Bration catalogs. They will only be available while supplies last!
Farther down in the post, in the supply list, you can click each item for a closer look.

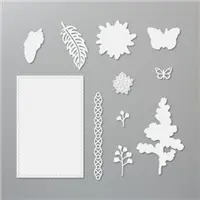
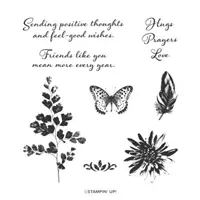
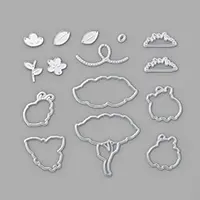
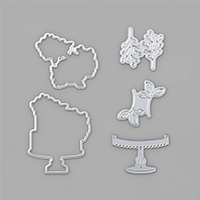
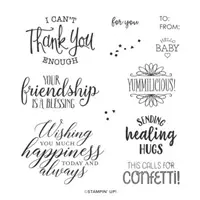
Nature’s Thoughts Dies #153586 $29.00 Coordinates with Positive Thoughts Stamp Set from Mini Catalog
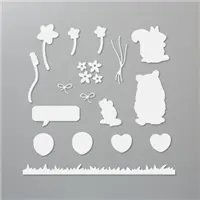
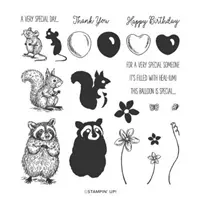
Special Day Dies #153587 $29.00 Coordinates with Special Someone Stamp Set from Mini Catalog

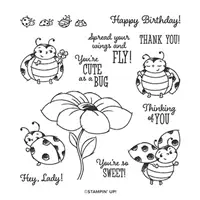
Ladybugs Dies #153588 $29.00 Coordinates with Little Ladybug Stamp Set from Sale-a-Bration Catalog (this stamp set is FREE HOST set that you’ll receive when you place a $300 order or more).
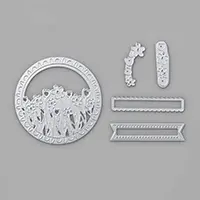
Sending Flowers Dies #153589 $27.00 Coordinates with Sending You Thoughts Stamp Set from Sale-a-Bration Catalog.

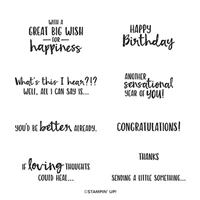
Birthday Dies #153590 $27.00 Coordinates with Happy Birthday to You Stamp Set from Sale-a-Bration Catalog
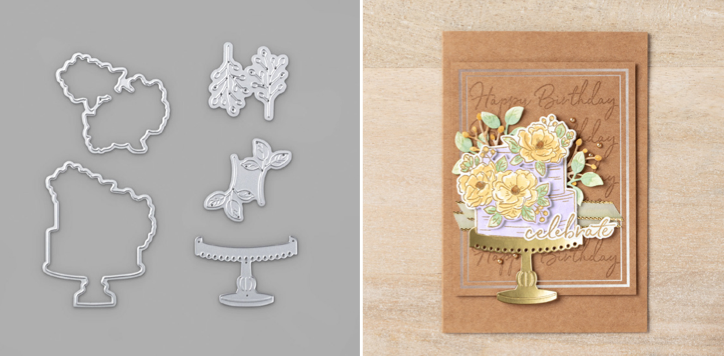
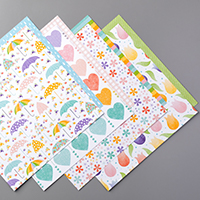
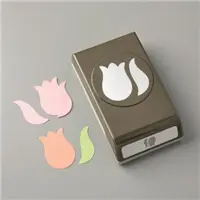
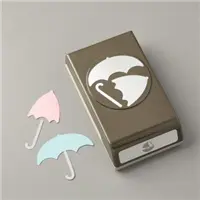
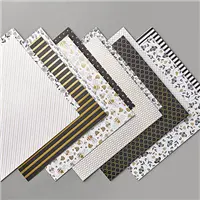
Pleased as Punch Designer Series Paper #153558 $11.50 Coordinates with Small Bloom Punch (Sale-A-Bration), Heart Punch Pack (Mini Catalog), Tulip Builder Punch (Mini Catalog), Builder Umbrella Punch (Mini Catalog)

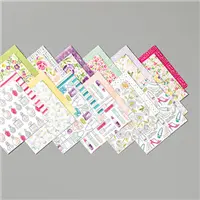
Supply List
Below you’ll find the new dies and Designer Series Paper as well as the products that coordinate with them.
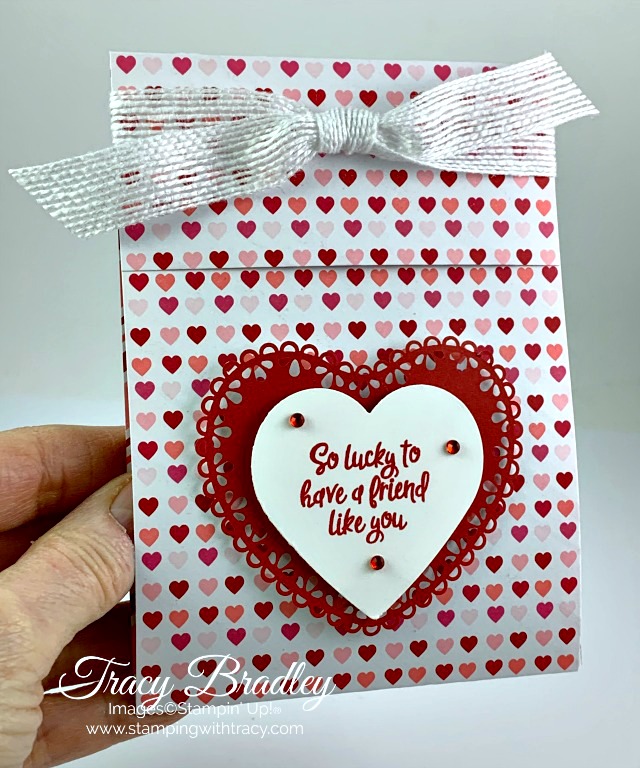
My Tuesday Tutorial is for a project I featured several weeks ago. As we’re getting closer to Valentine’s Day, I thought this project would be a good one to share again. You can access your FREE tutorial below.

Tracy’s Quick Links
Place an Order
My Customer Rewards
Bradley Points
$99 Starter Kit
Clearance Rack
Mini Catalog
Sale-A-Bration Catalog

by Tracy | Jan 31, 2020 | Die-Cutting, Embossing Folders

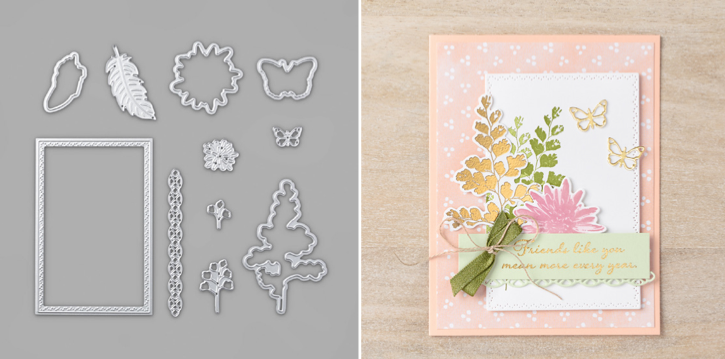
My card today features the stamp set Positive Thoughts and next week, on February 4th, you’ll be able to purchase the coordinating dies (while supplies last). Check back on Tuesday for all the details!

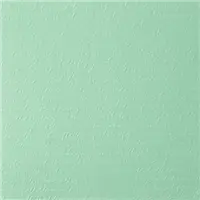
To create my card, I started with a base of Thick Whisper White cardstock. Granny Apple Green cardstock was used for the next layer but before adhering it to the card base, I ran it through my die-cutting machine using the Scripty 3D embossing folder. The Whisper White rectangle was cut using the Nature’s Thoughts Dies (will be released on February 4th). Before adhering the rectangle to the embossed Granny Apple Green layer, I stamped the leaf using Granny Apple Green ink and the stamp set, Positive Thoughts. I added Stampin’ Dimensionals to the back and attached it to the front of the card.

On a scrap piece of Whisper White cardstock, I stamped another leaf, also using Granny Apple Green ink but this time I did a technique called stamping off. After inking up the stamp, I stamped onto my grid paper and then stamped onto the Whisper White. This gives the illusion that two different colors of ink were used!
I also stamped a flower in Highland Heather ink and then cut both the flower and leaf out using the Nature’s Thoughts Dies. I added Stampin’ Dimensionals to the back of both pieces and adhered them to the card.

The sentiment, also from the stamp set Positive Thoughts, was stamped in Memento Ink onto Whisper White cardstock. Stampin’ Dimensionals were added to the back before attaching it to the card front. To complete the card, I added three rhinestones below the sentiment.
If you’d like to make today’s card, you’ll find the measurements below the Supply List.
Supply List
Please note: The Nature’s Thoughts Dies will not be available for purchase until February 4, 2020 and only while supplies last.
If you need any stamping supplies, I’d love to be your demonstrator! You can place an order by clicking any of the images below to go to my Stampin’ Up! online store. If you have questions about products you’re considering purchasing or ones you’ve already purchased, I’m just an email away (click the Email Me button on the sidebar of my blog).
Measurements
- Thick Whisper White cardstock; 11″ x 4-1/4″
- Granny Apple Green cardstock: 5-1/8″ x 3-7/8″
- Whisper White cardstock: approximately 3″ x 4-3/8″ for rectangle
- Whisper White cardstock: 3-1/8″ x 3/4″ for sentiment
- Whisper White cardstock: scraps for leaf and flower
Host Code and Card Kits
I have a new host code! All orders placed at my Stampin’ Up! online store receive at least one of my card kits and a PDF tutorial. Use the host code and I’ll send you an extra one!
- All orders receive 1 card kit
- Orders $50 – $149 receive 2 card kits (and you’ll start earning Bradley Points)
- Orders $150 or more receive 3 card kits
- Use the host code and you’ll receive one more card kit!
When you spend $50, you get to pick a FREE Sale-a-Bration gift! Spend $100 and you can choose from a Level 2 free gift or (2) Level 1 gifts. There’s no limit to how many gifts you can earn! You can learn more, here!
Tracy’s Quick Links
Place an Order
My Customer Rewards
Bradley Points
$99 Starter Kit
Clearance Rack
Mini Catalog
Sale-A-Bration Catalog
Have a great weekend!
by Tracy | Jan 30, 2020 | Designer Series Paper, Die-Cutting
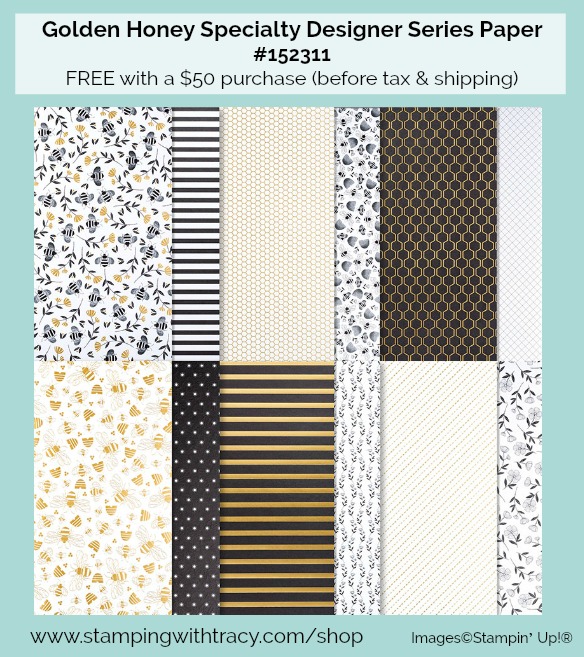
I used Stampin’ Up! Golden Honey Specialty Designer Series Paper to create today’s card. This paper is one of the FREE gifts you can choose during Sale-a-Bration when you place a $50 order (before tax and shipping). If you’d like to see all the gifts you can earn, this link will take you to the Sale-a-Bration PDF brochure.
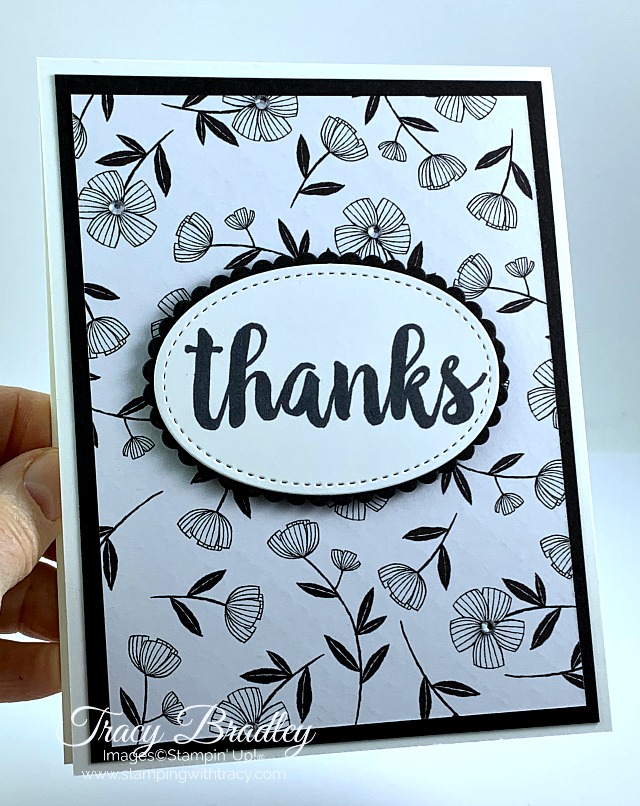
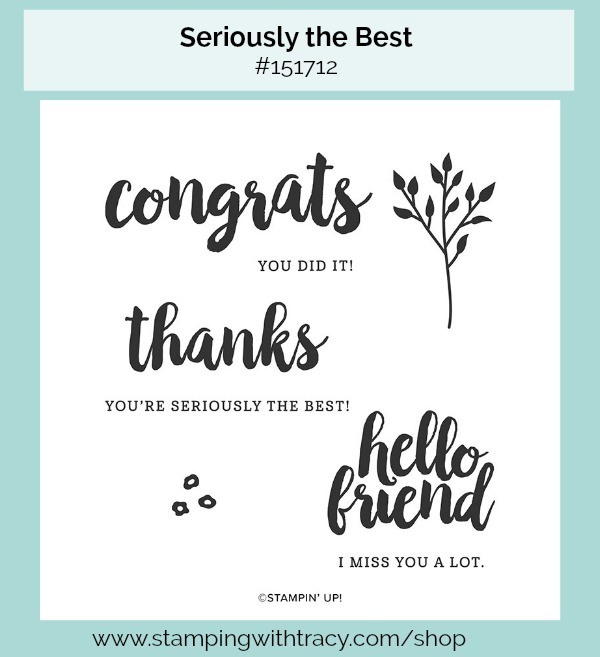
I started with a base of Thick Whisper White cardstock and added a layer of Basic Black. I then added another layer using Golden Honey Designer Series Paper. My sentiment was inked up with Memento Ink using the stamp set, Seriously the Best, which is a new stamp set in the Mini Catalog. It was cut out with the Stitched Shapes Dies using a die-cutting machine. I also cut out a Basic Black scalloped oval using the Layering Ovals Dies. It’s hard to see in my photo but to complete my card I added a rhinestone in the middle of five flowers.

If you’d like to create today’s quick and easy card, you’ll find the measurements below the supply list.
Supply List
If you need any stamping supplies, I’d love to be your demonstrator! You can place an order by clicking any of the images below to go to my Stampin’ Up! online store. If you have questions about products you’re considering purchasing or ones you’ve already purchased, I’m just an email away (click the Email Me button on the sidebar of my blog).
Measurements
- Thick Whisper White cardstock: 11″ x 4-1/4″
- Basic Black cardstock: 5-1/4″ x 4″
- Golden Honey Specialty Designer Series Paper: 5″ x 3-3/4″
- Whisper White cardstock: scrap for sentiment
- Basic Black cardstock: scrap for scalloped oval
Tracy’s Quick Links
Place an Order
My Customer Rewards
Bradley Points
$99 Starter Kit
Clearance Rack
Mini Catalog
Sale-A-Bration Catalog

The best deal during Sale-a-Bration is purchasing the Starter Kit! It’s the ultimate bundle (and it ships FREE)! For more information about the Starter Kit, click here!
If you have any questions, don’t hesitate to contact me. Have a great day!
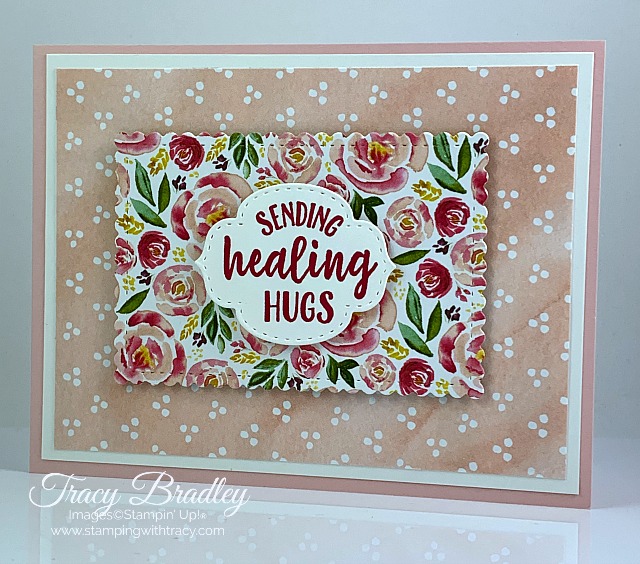
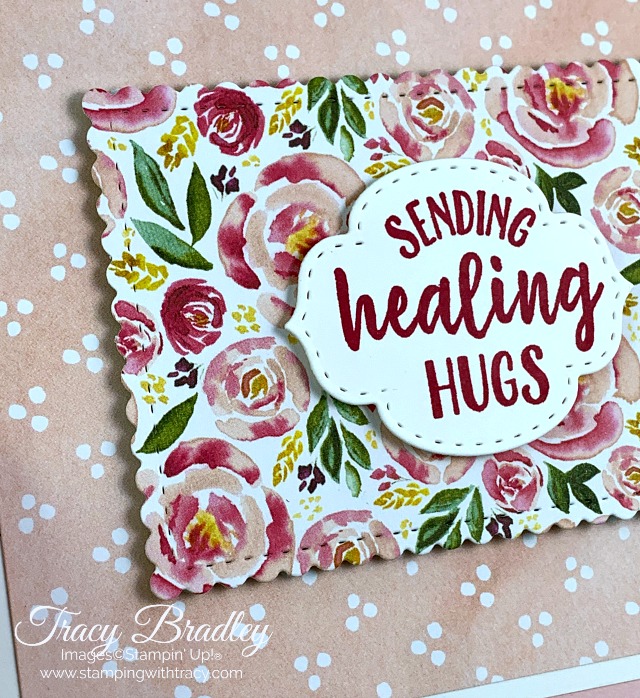
by Tracy | Jan 29, 2020 | Designer Series Paper, Die-Cutting, Get Well Card

A great place to get inspiration is right from the pages of a Stampin’ Up! catalog! As I was looking through the new Mini Catalog, I saw a card (page 21) that started some ideas flowing and this is the card I created!
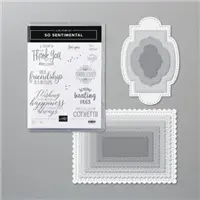
I used the stamp set, So Sentimental, along with the coordinating Stitched So Sweetly Dies. Purchase these two items using the special bundle item number (153828) and you’ll save 10%!

The base of the card is Petal Pink cardstock with a layer of Whisper White cardstock. The Designer Series Paper is Best Dressed which is 6″ x 6″ paper. Our Stitched So Sweetly Dies were used to cut out the sentiment as well as the stitched rectangle under it. Lovely Lipstick ink was used with the So Sentimental stamp set for the sentiment. I popped both the sentiment and the scalloped rectangle up with Stampin’ Dimensionals. If you’d like to make today’s card, you can find the measurements below.
Measurements
- Petal Pink cardstock: 11″ x 4-1/4″
- Whisper White cardstock: 5-1/4″ x 4″
- Best Dressed 6″ x 6″ Designer Series Paper: 5″ x 3-3/4″
- Best Dressed 6″ x 6″ Designer Series Paper: scrap for rectangle (approx. 3-3/4″ x 2-3/4″)
- Whisper White cardstock: scrap for sentiment
Supply List
If you need any stamping supplies, I’d love to be your demonstrator! You can place an order by clicking any of the images below to go to my Stampin’ Up! online store. If you have questions about products you’re considering purchasing or ones you’ve already purchased, I’m just an email away (click the Email Me button on the sidebar of my blog).
Place a $50 order (before shipping/tax) and you can choose a FREE Sale-a-Bration gift! There’s no limit to how many free gifts you can earn. If your order total reaches $100, you can choose an item from the $100 category or (2) $50 gifts. You can find more information here!
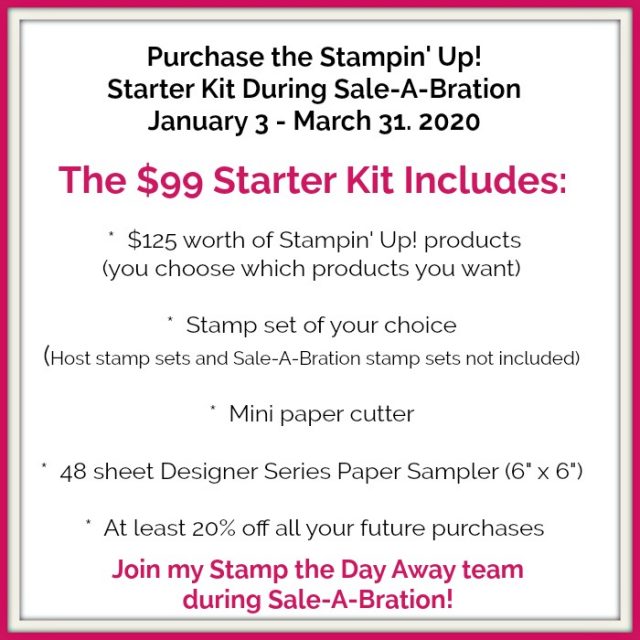
If you’re planning to place a $99 order, you might want to consider purchasing the Starter Kit! You’ll pick $125 worth of Stampin’ Up! product and because it’s Sale-A-Bration, you’ll also receive a mini paper cutter, a Designer Series Paper Sampler and a free stamp of your choice! You won’t pay shipping when you purchase the Starter Kit because it always ships FREE! You’ll also start receiving at least a 20% discount on all your future purchases. When you purchase the Starter Kit, you become a demonstrator and many people think they need to start having parties and selling to others but that’s only if you want to! You can choose to purchase just for yourself or start your own business. There’s absolutely no risk but there are plenty of perks! If you’d like more information, you can click here or feel free to contact me!
Tracy’s Quick Links
Place an Order
My Customer Rewards
Bradley Points
$99 Starter Kit
Clearance Rack
Mini Catalog
Sale-A-Bration Catalog
If you have any questions, don’t hesitate to contact me!
by Tracy | Nov 29, 2019 | Designer Series Paper, Die-Cutting, Heat Embossing, Rectangle Stitched Dies

I hope everyone from the U.S. had an enjoyable Thanksgiving yesterday!
It’s the biggest shopping day of the year! I bet some of you were out at the crack of dawn, if not earlier, grabbing some great deals. Personally, I get a little cranky with lots of crowds so I prefer to do my shopping sitting at home in front of my computer. Because it’s Black Friday, I have a special when you place a Stampin’ Up! order at my online store today.

Fine Details:
After you place your order, I’ll send an email to you to find out your choice(s) or you can immediately email me with what you’d like.
- The host code UQK3VSNJ must be used when placing your order.
- All orders will receive an extra card kit.
- $50-$74.99 order will receive a free package of rhinestones (choose from Holiday, Noble Peacock, or Basic Jewels)
- $75-$99.99 order will receive a free embossing folder (your choice)
- $100 -$149.99 order will receive both the rhinestones & embossing folder
- Orders over $150, do not use the Host Code so you’ll receive Stampin’ Rewards from Stampin’ Up! (free product) plus you’ll receive rhinestones and an embossing folder from me.
I’ll place the orders for the free gifts tomorrow. After I receive them from Stampin’ Up!, I’ll send them out to you (your free gifts should arrive in approximately two weeks).
Very important: If I don’t receive a response from you before 10:00 am (Pacific Time) on Saturday morning, November 30th, I reserve the right to choose your free gifts so I can finalize the order and the gifts will arrive in the time I stated above.
Offer valid in the U.S.
Place your order here!
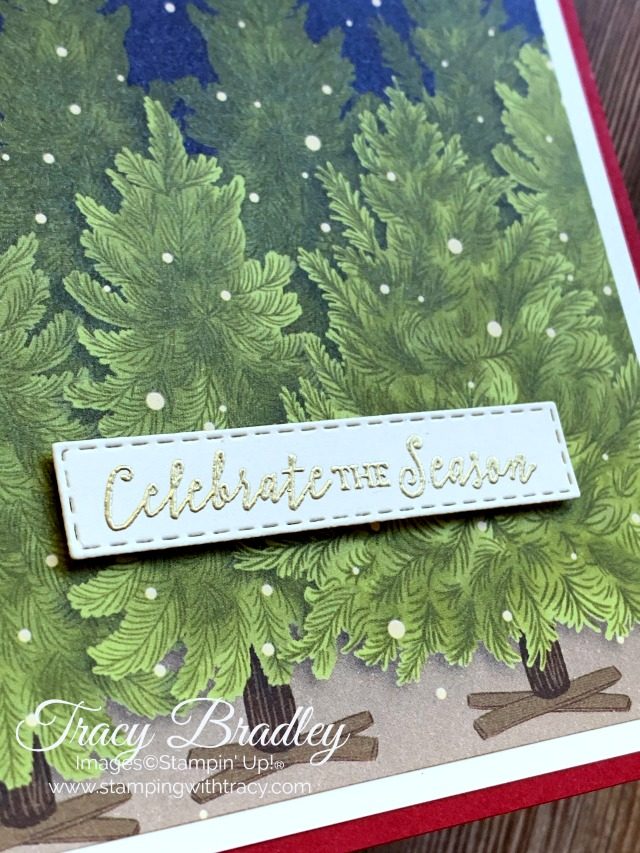
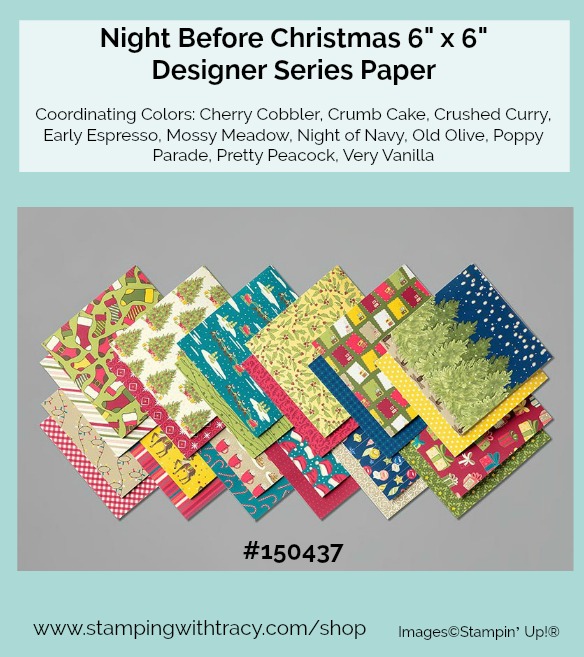
My card today features the stamp set Itty Bitty Christmas and our 6″ x 6″ Night Before Christmas Designer Series Paper. With all the beautiful designs on this paper, card-making is super easy!

I embossed the sentiment with gold embossing powder and cut it out using my die-cutting machine and the Stitched Rectangle Dies. If you haven’t embossed before, it’s pretty easy. Here are the instructions:
Prepare your cardstock by rubbing the Embossing Buddy over the surface (this helps keep away stray particles of embossing powder). Stamp your sentiment or image using a Versamark pad. This is very sticky ink and your embossing powder will stick right to it. Sprinkle embossing powder over the stamped image. Shake off any excess. Before applying heat to your paper, heat the Heat Tool first so the paper won’t warp (about 10 seconds). Direct the heat over your image and watch the magic happen!
You’ll find all the products I used to create today’s card listed below. Simply click any of the images to place an order or for more information.
Supply List
Have a great day! Thanks for stopping by!
by Tracy | Nov 25, 2019 | Designer Series Paper, Die-Cutting, Heat Embossing, Layering Circles Dies, Stitched Shapes Dies
Happy Monday!
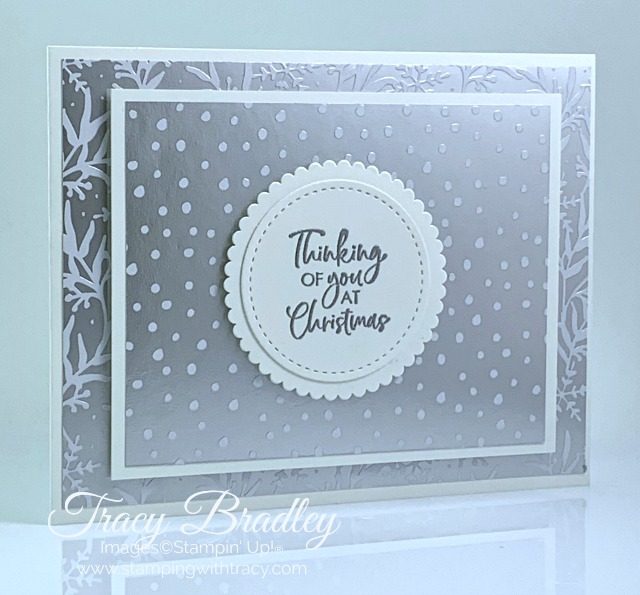
Today’s card is all about foil! If you like sparkle, you’re going to love Feels Like Frost Designer Series Paper. Each sheet in this 6″ x 6″ Designer Series Paper is double-sided with a beautiful foil pattern on one side and realistic designs on the other. I combined two of the foil designs to create today’s card. It can be really difficult to photograph foil paper and the beauty of the paper is hard to capture but it’s very pretty in person!
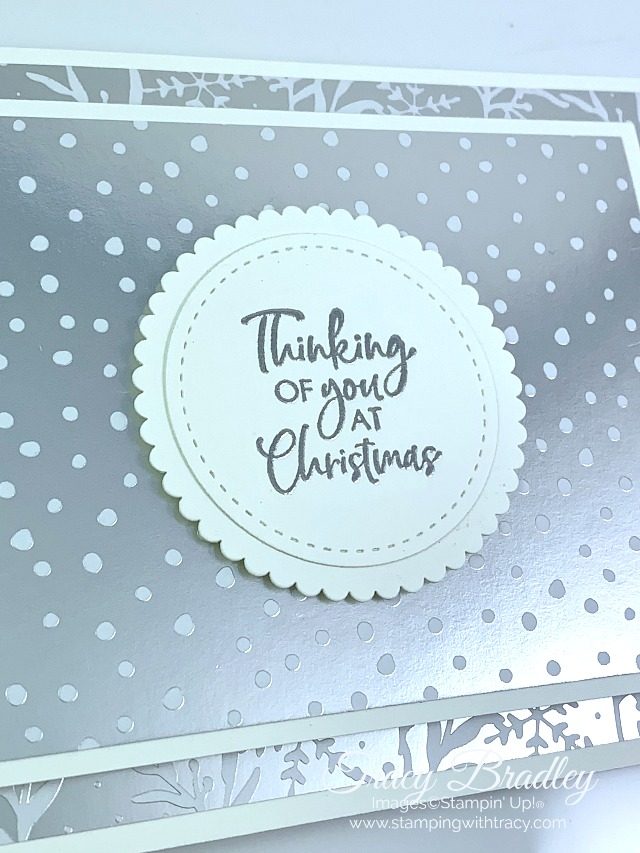
I embossed my sentiment from the Itty Bitty Christmas stamp set. At this time of year embossing adds a special touch to your cards. To cut the sentiment out, I used the Stitched Shapes Dies. The scalloped circle underneath it was cut out with the Layering Circles Dies. I added Stampin’ Dimensionals to the back of the scalloped oval as well as the smaller panel of foil and cardstock.
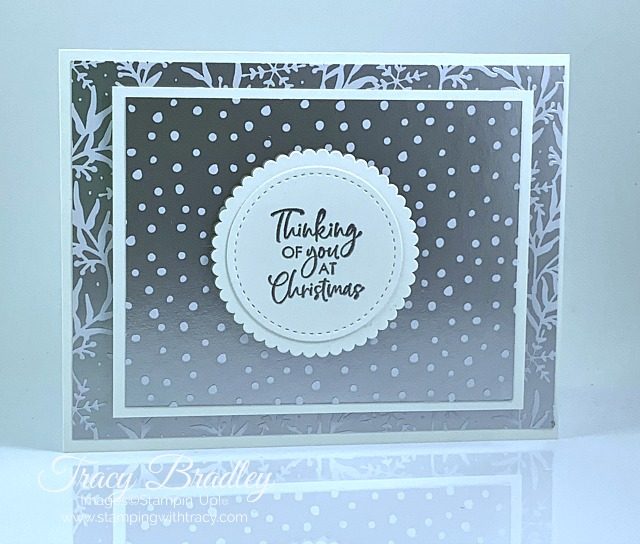
Heat Embossing Directions
Prepare your cardstock by rubbing the Embossing Buddy over the surface (this helps keep away stray particles of embossing powder). Stamp your sentiment or image using a Versamark pad. This is very sticky ink and your embossing powder will stick right to it. Sprinkle embossing powder over the stamped image. Shake off any excess. Before applying heat to your paper, heat the Heat Tool so the paper won’t warp (about 10 seconds). Direct the heat over your image and watch the magic happen!
Supply List
If you need any stamping supplies, I’d love to be your demonstrator! You can place an order by clicking any of the images below to go to the homepage of my Stampin’ Up! online store. If you have questions about products you’re considering purchasing or ones you’ve already purchased, I’m just an email away (click the Email Me button on the sidebar of my blog).
Thanks for stopping by today! Happy Crafting!
Tracy’s Quick Links
Place an Order
My Customer Rewards
Bradley Points
$99 Starter Kit
Clearance Rack
Holiday Catalog