by Tracy | May 8, 2020 | Uncategorized
One of my favorite punches, the Starburst Punch, is retiring and is now on the Low Inventory List which means it will be selling out soon. If you follow me, you know I love my die-cutting machine but I also enjoy using punches and this one will be greatly missed. Below I’m sharing past projects using the Starburst Punch. Please note: some of the samples below contain products that have retired or are now on the retiring list.
Edited to Add: When I wrote this post last week, the Starburst Punch was on the Low Inventory List. Stampin’ Up! must have received an extra shipment because while it is still retiring, it’s no longer on the Low Inventory List. In years past, once an item appeared on that list, it meant it would be gone soon. The good news is that there’s still more time to add it to your collection!

On the first two cards, I paired the Starburst punch with the Stitched Shapes Dies.
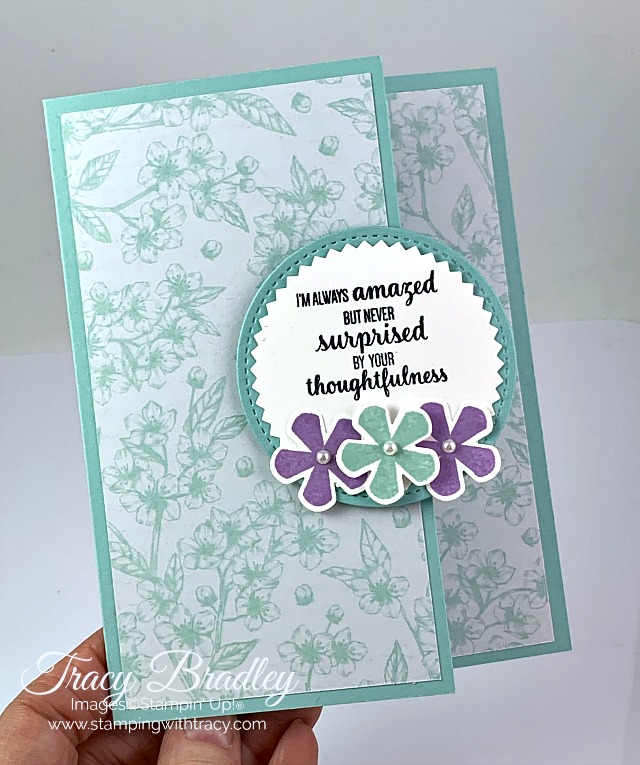
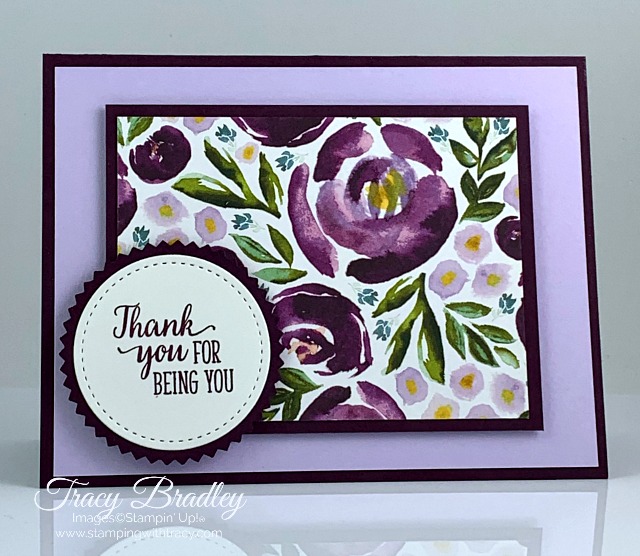
In all the projects below, I used the Starburst Punch with the 2″ Circle Punch.


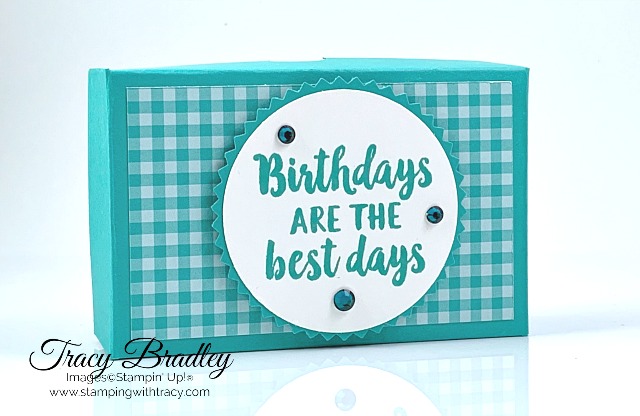

If you’d like to purchase the Starburst Punch before it’s gone, click here!


My May Card Sampler is available for a limited time! For more information, click here.
Tracy’s Quick Links
Place an Order
My Customer Rewards
Bradley Points
$99 Starter Kit
Last Chance Products
Clearance Rack
Mini Catalog
by Tracy | May 7, 2020 | Card Sampler, Designer Series Paper, Die-Cutting, Embossing Folders
My May Card Sampler is now available but for a limited time!
Here’s how you can earn my FREE May Card Sampler:
- Place a minimum $50 order (before tax/shipping) at my Stampin’ Up! online store.
- Use my special May Card Sampler Host Code when placing your order: RXQPTJ7J
- Place your order on or before Monday, May 11, 2020.
- If your order reaches $150 or more, please DO NOT use the host code so you can receive Stampin’ Rewards (free product directly from Stampin’ Up!). Once you place your order, simply drop me an email letting me know that you’d like the Card Sampler (you only need to contact me if your order is over $150).
Here’s What You’ll Receive:
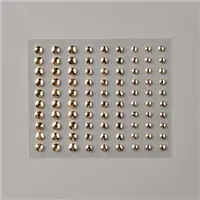
- A half-sheet of Champagne Rhinestones with plenty left over for future projects
- All the paper and embellishments needed to make 6 cards (2 each of three designs). The paper will be cut, scored, embossed and die cut for you! You’ll need to supply your own adhesive, ink and stamp set (per Stampin’ Up! I cannot send stamped images). Envelopes will also be provided for each card.
- A PDF Tutorial with instructions, pictures, cutting measurements and a complete supply list of all the products used.
- You’ll earn at least one Bradley Point.
All the Other Important Stuff
- Your kits will ship first-class mail no later than Monday, May 18, 2020 and will be mailed to the address used on your online order.
- Your PDF Tutorial will be emailed to you within 24 hours.
- When using the May Card Sampler Host Code to place your order, you will not qualify for my regular Customer Rewards Card Kits.
- Per Stampin’ Up! policy, kits can only be mailed within the United States.
- Limit 1 kit per person
The special May Card Sampler HOST CODE will close at the end of the day on Monday, May 11, 2020 and after that date, the card sampler will no longer be available.
Expected ship date of the kits is Monday, May 18, 2020.
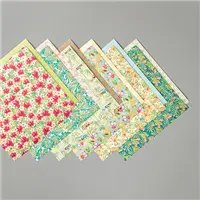
Please note: The paper used to create the May Card Sampler kits includes Bird Ballad Designer Series Paper. This paper is currently on the Last Chance List and is available while supplies last or June 2, 2020.
Click here to place an order!

Supplies Needed to Complete the May Card Sampler
Listed below are the supplies, not included in your kit, that you’ll need to complete the cards exactly as shown (or you can use what you already own). Simply click any of the products and you’ll be taken to my Stampin’ Up! online store. When placing your order, don’t forget to use the special May Card Sampler host code (please do not use host code if your order is over $150 – see above).
Click here to place an order
If you aren’t sure how to use a host code, click here!
If you have questions, please don’t hesitate to contact me!
by Tracy | May 6, 2020 | Designer Series Paper, Die-Cutting, Layering Squares Dies, Stitched Shapes Dies
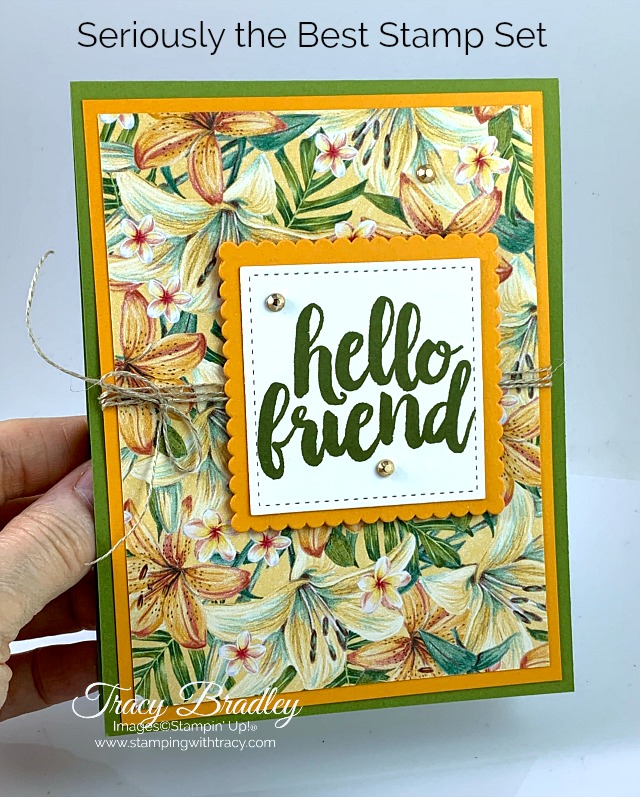
Before sharing my card with you today, I wanted to let you know that the Stitched So Sweetly Dies are on the Low Inventory List again. Once they go into Backorder status, there’s no indication how long the wait will be before they are back in stock. Click here to see if they’re still in stock.
Today’s card features the stamp set, Seriously the Best. I love stamps with big bold sentiments and I was hoping this set would carry over into the new catalog but sadly, it isn’t. All retiring stamp sets will have guaranteed availability until May 22, 2020 and after that date, only while supplies last.


Doesn’t this paper get you into a tropical frame of mind? My card on Monday was also made using Tropical Oasis Designer Series Paper and if you missed it, you can see it here. This paper debuted in the Mini Catalog and is on the retiring list. The coordinating colors are: Mango Melody, Old Olive, Daffodil Delight, Early Espresso, Grapefruit Grove, Mint Macaron, Pear Pizzazz, Pool Party, Pretty Peacock, Real Red, Soft Sea Foam, Soft Suede, So Saffron and Whisper White. Stampin’ Up! takes the guesswork out of figuring out which colors to use with their papers!

After adhering the Tropical Oasis DSP to the Mango Melody cardstock, I wrapped Linen Thread around the paper three times, tied a knot and then made a bow. The sentiment was cut out using the Stitched Shapes Dies (also on the Low Inventory List) and then adhered to a piece of Mango Melody cardstock, cut out with the Layering Squares Dies. Stampin’ Dimensionals were added to the back to give it a nice pop. To complete the card, I added three Gilded Gems. All the measurements I used can be found below the Supply List.

Supply List
If you need any stamping supplies, I’d love to be your demonstrator! You can place an order by clicking any of the images below to go to my Stampin’ Up! online store. If you have questions about products you’re considering purchasing or ones you’ve already purchased, I’m just an email away (click the Email Me button on the sidebar of my blog).
Measurements
- Old Olive cardstock: 11″ x 4-1/4″
- Mango Melody cardstock; 5-1/4″ x 4″
- Mango Melody cardstock: scrap for scalloped square
- Tropical Oasis Designer Series Paper: 5″ x 3-3/4″
- Whisper White cardstock: scrap for sentiment
- Whisper White cardstock: 5-1/4″ x 4″ for inside of the card
Click here to see all retiring products!
Stamp sets have guaranteed availability until May 22, 2020 and after that date, only while supplies last. Everything else is available while supplies last or June 2, 2020.
Tracy’s Quick Links
Place an Order
My Customer Rewards
Bradley Points
$99 Starter Kit
Clearance Rack
Mini Catalog
by Tracy | May 5, 2020 | Designer Series Paper, Die-Cutting, Free Tutorial

My Tuesday Tutorials are back! Today’s FREE PDF Tutorial is for the card I shared yesterday. Two products I used to create today’s card are currently on the Retiring List and will only be available while supplies last or June 2, 2020: Tropical Oasis Designer Series Paper and Springtime Impressions Dies. The Springtime Impressions Dies were used to create the butterfly and they are on sale (originally 29.00, on sale for $11.60)! To see yesterday’s post, click here. You can access the free tutorial below the Supply List.

Supply List
If you need any stamping supplies, I’d love to be your demonstrator! You can place an order by clicking any of the images below to go to my Stampin’ Up! online store. If you have questions about products you’re considering purchasing or ones you’ve already purchased, I’m just an email away (click the Email Me button on the sidebar of my blog).
Sale: $11.60
Price: $29.00

Tracy’s Quick Links
Place an Order
My Customer Rewards
Bradley Points
$99 Starter Kit
Clearance Rack
Mini Catalog
Not sure how to use a host code? Click here.
Click here to see all the products on the Last Chance (Retiring) List.
by Tracy | May 4, 2020 | Die-Cutting, Fun Fold Card, Quick & Easy Card
Today’s card features the Springtime Impressions Dies. This set of dies is on the Retiring List and on sale for a great price!

Tropical Oasis Designer Series Paper, which debuted in the Mini Catalog, is also retiring. I love all the vibrant colors and tropical feel of this paper.
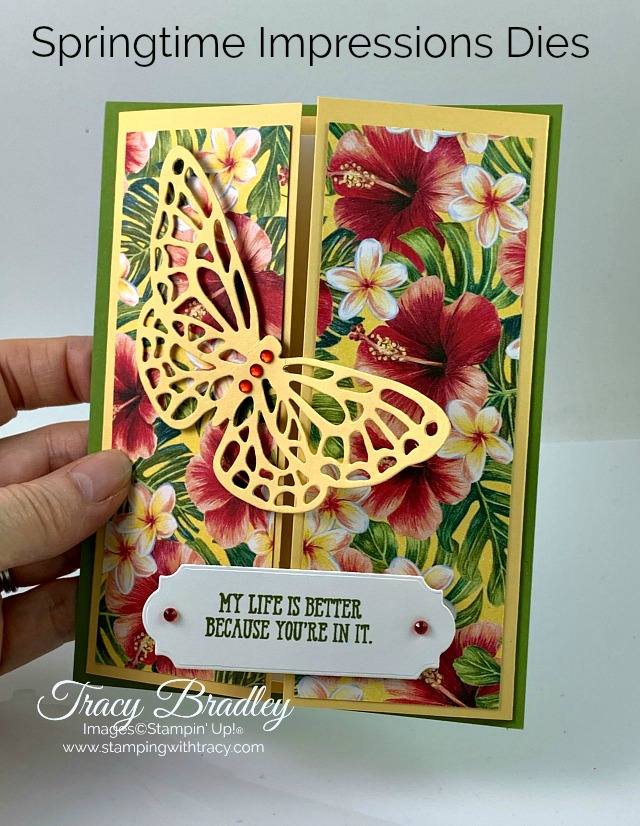
This gate-fold card is really quick and easy to make. The base of the card is a single piece of Old Olive cardstock. To create the gate, the So Saffron cardstock is scored in two places (you can find all the measurements below the supply list).
The butterfly has one Mini Stampin’ Dimensional down its center and is positioned so that it covers both sides of the fold. The sentiment was stamped onto Whisper White cardstock using Old Olive ink and was cut out using the Ornate Frames Dies. These dies debuted in the Holiday Mini Catalog and currently can’t be found in a catalog but are available for purchase here. They will be carrying over into the new Annual Catalog which debuts on June 3rd.



Supply List
If you need any stamping supplies, I’d love to be your demonstrator! You can place an order by clicking any of the images below to go to my Stampin’ Up! online store. If you have questions about products you’re considering purchasing or ones you’ve already purchased, I’m just an email away (click the Email Me button on the sidebar of my blog).
Sale: $11.60
Price: $29.00
Measurements for Today’s Card
- Old Olive cardstock: 5-1/2″ x 4-1/4″
- So Saffron cardstock: 8″ x 5-1/4″ score @ 2″ & 6″
- So Saffron cardstock: scrap for butterfly
- Tropical Oasis Designer Series Paper: (2) 5″ x 1-3/4″
- Whisper White cardstock: 5″ x 3-3/4″
- Whisper White cardstock: scrap for sentiment
Many products from the Annual Catalog and January – June 2020 Mini Catalog are retiring, some with discounted prices, and everything is while supplies last or June 2, 2020. To see all the retiring products, click here!
To learn all about my Customer Rewards, click here.
Tracy’s Quick Links
Place an Order
My Customer Rewards
Bradley Points
$99 Starter Kit
Clearance Rack
Mini Catalog

The Ornate Garden Suite is just one of the new suite of products available in the 2020-2021 Annual Catalog which debuts on June 3, 2020. Stampin’ Up! has released these products early and they are available now. Click here to see a full 3 page PDF flyer of these fun new products. You can purchase the products here.
by Tracy | May 1, 2020 | Uncategorized
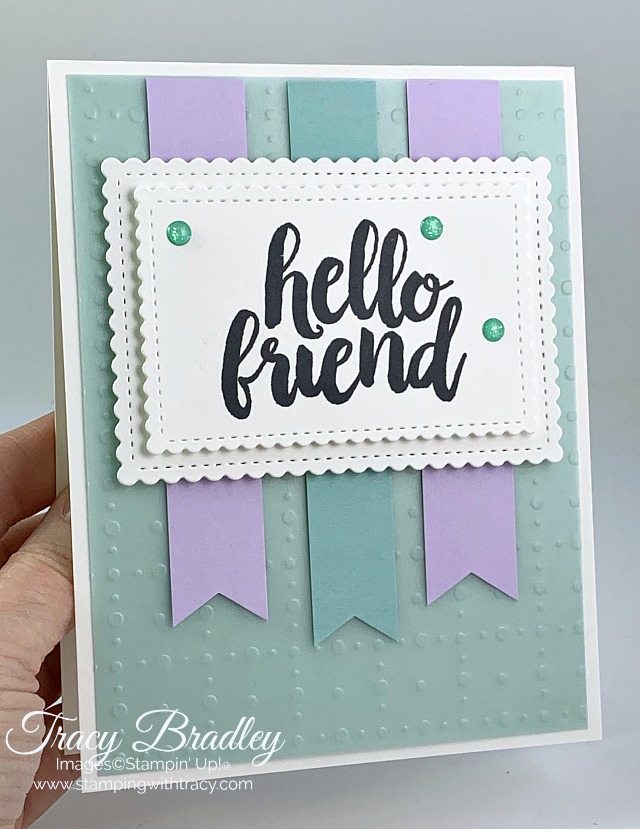
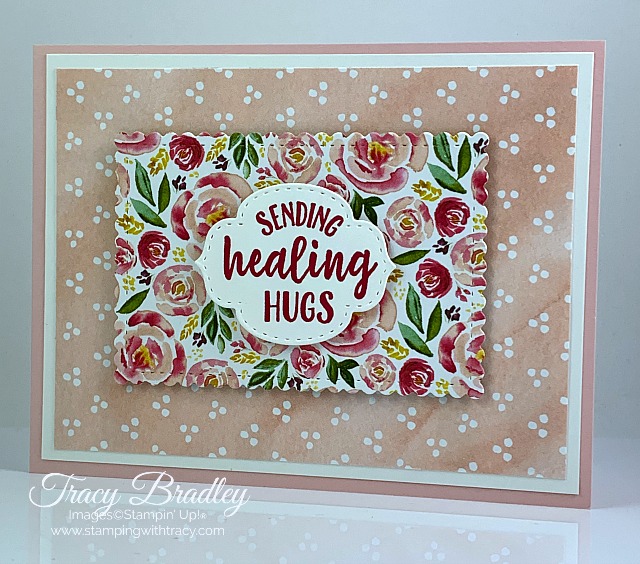
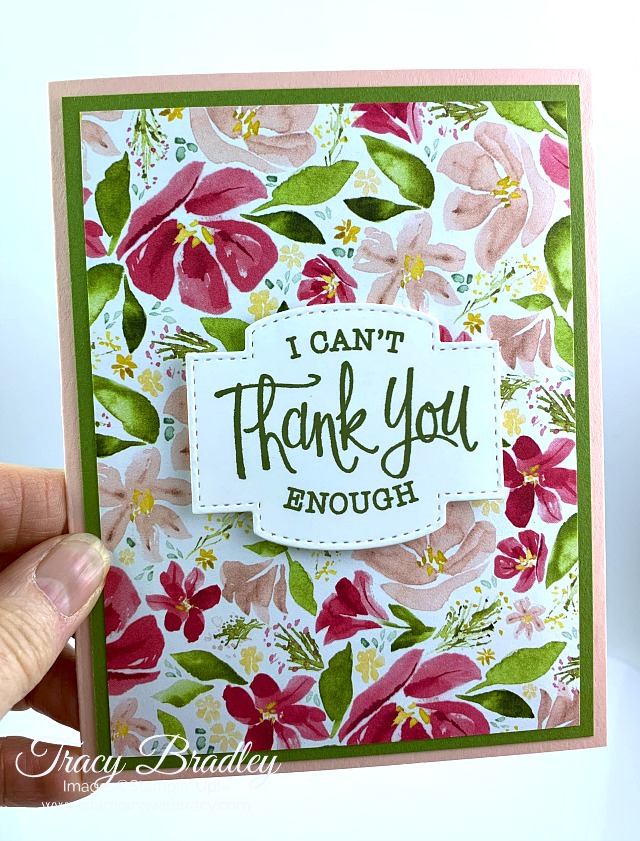
The Stitched So Sweetly Dies are back in stock! These dies debuted in the Mini Catalog and have been on backorder but are now available for purchase.

Below are a few cards I’ve shared using these fun dies! Click on the picture of the card to see the original blog post.




Click here to purchase the Stitched So Sweetly Dies
Tracy’s Quick Links
Place an Order
My Customer Rewards
Bradley Points
$99 Starter Kit
Clearance Rack
Mini Catalog

My April Card Sampler is available until tomorrow, Saturday, May 2, 2020. Place a minimum $50 order using the host code 7XQQSXCV and I’ll send you 6 card kits with envelopes (2 of three different designs), a PDF Tutorial with pictures, directions and supply list plus a package of embellishments as a bonus! For more information click here!

Stay safe and healthy!
by Tracy | Apr 29, 2020 | Uncategorized

Stampin’ Up! is committed to making a difference in our global communities and caring about people first. As part of their Making a Difference program, Stampin’ Up! is offering a product giveback opportunity to support organizations that are helping COVID-19 frontline responders and communities vulnerable to the pandemic.
You can purchase the Share Sunshine PDF Download and Stampin’ Up! will donate 100% of the proceeds to COVID-19 efforts.
The Share Sunshine PDF Download is a digital stamp set that has both lighthearted and heartfelt sentiments and imagery relevant to the unique COVID-19 and social distancing situation we’re currently experiencing. You can use the download in your cardmaking and papercrafting projects. Simply print the imagery on cardstock and cut it out using the Stampin’ Up! Paper Trimmer, punches, or dies.
- What: Share Sunshine PDF Download
- Price: $12.00
- When: April 28 – June 2, 2020 or possibly later
As part of Stampin’ Up!’s Making a Difference program, 100% of the Share Sunshine PDF Download proceeds will go to COVID-19 efforts through these organizations:
- The World Health Organization’s COVID-Solidarity Response Fund. Learn more about WHO here
- United Way Worldwide’s COVID-19 Community Response and Recovery Fund. Learn more about United Way here.
Click here to Purchase the 15 page Share Sunshine PDF Download.
Since this is a special promotion from Stampin’ Up!, I won’t be notified when you order this download. You can only purchase it HERE and it can’t be combined with products from my online store.
When you purchase the Share Sunshine PDF Download, you’ll be able to instantly download it and begin using it!

The Stampin’ Up! retiring list was posted last week for the 2019-2020 Annual Catalog and the 2020 Mini Catalog. All items are available while supplies last or June 2nd and some products are on sale!
Please note: Stampin’ Blends are on the retiring list but they are NOT retiring!! They are being repackaged as combo packs for the new catalog and will no longer be available to purchase individually.
Click here to shop the retiring list!
My April Card Sampler is available until Saturday, May 2, 2020. Place a minimum $50 order using the host code 7XQQSXCV and I’ll send you 6 card kits with envelopes (2 of three different designs), a PDF Tutorial with pictures, directions and supply list plus a package of embellishments as a bonus! For more information click here!

The Ornate Garden Suite will be in the new 2020-2021 Annual Catalog but you can purchase these products now!
Click here for a three page PDF Tutorial of the products.
You can see this suite of products here at my Stampin’ Up! online store.
Be safe and healthy!
by Tracy | Apr 27, 2020 | Uncategorized
My April Card Sampler is now available but for a limited time!
Here’s how you can earn my FREE April Card Sampler:
- Place a minimum $50 order (before tax/shipping) at my Stampin’ Up! online store.
- Use my special April Card Sampler Host Code when placing your order: 7XQQSXCV
- Place your order on or before Saturday, May 2, 2020.
- If your order reaches $150 or more, please DO NOT use the host code so you can receive Stampin’ Rewards (free product directly from Stampin’ Up!). Once you place your order, simply drop me an email letting me know that you’d like the Card Sampler (you only need to contact me if your order is over $150).
Here’s What You’ll Receive:
- a FREE package of embellishments
- All the paper and embellishments needed to make 6 cards (2 each of three designs). The paper will be cut, scored, punched and die cut for you! You’ll need to supply your own adhesive, ink and stamp set (per Stampin’ Up! I cannot send stamped images). Envelopes will also be provided for each card.
- A PDF Tutorial with instructions, pictures, cutting measurements and a complete supply list of all the products used. Keep the instructions in a binder so you can refer to them over and over again!
All the Other Important Stuff
- Your kits will ship first-class mail no later than Saturday, May 9, 2020 and will be mailed to the address used on your online order.
- On Saturday, May 9, 2020, you’ll receive an email from me that will include your PDF Tutorial.
- When using the April Card Sampler Host Code to place your order, you will not qualify for my regular Customer Rewards Card Kits.
- Per Stampin’ Up! policy, kits can only be mailed within the United States.
The special April Card Sampler HOST CODE will close at the end of the day on Saturday, May 2, 2020 and after that date, the card sampler will no longer be available!
Expected ship date of the kits is Saturday, May 9, 2020.
Click here to place an order!
Supplies Needed to Complete the April Card Sampler
Listed below are the supplies, not included in your kit, that you’ll need to complete the cards exactly as shown (or you can use what you already own). Simply click any of the products and you’ll be taken to my Stampin’ Up! online store. When placing your order, don’t forget to use the special April Card Sampler host code 7XQQSXCV to receive your free package of embellishments, card kits, and PDF tutorial (please do not use host code if your order is over $150 – see above).
If you aren’t sure how to use a host code, click here!
Click here to place an order!
If you have any questions, please let me know!
by Tracy | Apr 24, 2020 | Uncategorized
Thank you so much to everyone who has reached out to me during this difficult time. Under normal circumstances my family would have been gathered together to mourn the loss of our loved one but during these trying times, that hasn’t been possible. Your words of support and encouragement have been so appreciated and I can’t thank you enough for your kindness.
The Retiring List was published several days ago and I’m the first to admit that it can be downright confusing. As I mentioned previously, Stampin’ Blends are NOT retiring but you will no longer be able to buy them individually in the new catalog. They will be repackaged as a combo pack only and the item numbers will change which is why they are on the retiring list. Big sigh of relief! But it is possible that once stock is depleted in certain colors that they won’t be available again until the new catalog debuts on June 3rd. Both Old Olive Light and the Old Olive Combo Pack have already sold out so if you don’t want to wait until June to purchase certain colors, I’d recommend getting them now.
Dies
When the current Annual Catalog went live last year, Stampin’ Up! transitioned to a new style of dies and the packaging changed along with new item numbers. Some of the dies in the current catalog still have the old numbers but will transition to new item numbers in the new catalog which explains why certain dies are showing up on the Retiring List but are in fact, NOT RETIRING. It’s my understanding that once stock of the old item numbers is depleted, a switch will be made in the store with the new item numbers. They are:
Well Written
Stitched Rectangles
Layering Circles
Layering Ovals
Layering Squares
Nature’s Roots – on sale!!
Stitched Be Mine
The Woodland Embossing Folder is also on the retiring list but it’s NOT retiring.
If you have any questions, please don’t hesitate to contact me!
I have a new host code! Use this when placing an order under $150 and you’ll receive an extra card kit. Orders over $150 will automatically receive the extra kit (by not using the host code when your order is over $150, you’ll earn Stampin’ Rewards – FREE PRODUCT – directly from Stampin’ Up! ).
Click here to place an order!
Click here to head over to the Retiring List at my Stampin’ Up! Online Store
by Tracy | Apr 23, 2020 | Uncategorized
It’s always fun anticipating new products but it’s hard saying goodbye to retiring items. I thought I’d compile a list of tools that I’m sorry to see won’t be returning. You can see all the retiring products over at my Stampin’ Up! online store HERE.
- Stampin’ Blends are NOT retiring but in the new catalog you’ll only be able to purchase them as a set so grab the individual pens while you can!
- 1″ Circle Punch
- 1-1/8″ Scallop Circle Punch – on sale!
- 1-3/8″ Scallop Circle Punch – on sale!
- Leaf Punch
- Starburst Punch
- Bird Ballad Laser-Cut Cards & Tin – on sale!
- Country Floral Embossing Folder – on sale!
- Eyelet Lace Embossing Folder
- Layered Leaves Embossing Folder
- Darling Label Punch Pack – includes a stamp set, 2 Stampin’ Spots, punch and a tin normally $45.00 on sale for $6.75!
- Embossing Buddy
- Glitter Enamel Dots
- Noble Peacock Rhinestones – on sale!
- Flax Ribbon – on sale!
- Whisper White Solid Baker’s Twine
- 3″ x 6″ Gusseted Bags
Click here to place an order!

If you have any questions, don’t hesitate to contact me!
by Tracy | Apr 22, 2020 | Uncategorized
Stampin’ Up! has released all of the products that will be retiring from both the Annual and Mini Catalogs. Everything is while supplies last! Please be aware of several things:
- All bundles in both catalogs are available while supplies last but the products in the bundles are not necessarily retiring (when you purchase bundles, you save 10%). For instance, the Under My Umbrella Bundle is retiring but both products in the bundle are not retiring and will be in the new Annual Catalog. The Honey Bee Bundle is retiring AND both of the products in the bundle are retiring.
- You’ll see that our Stampin’ Blends are also on the retiring list BUT THEY ARE NOT RETIRING. They are just being reconfigured in the new catalog. From what I can see, they will no longer be offered individually but only as a combo pack in the new catalog.
- Everything is while supplies last except for stamp sets. Due to high demand, retiring stamp sets will have guaranteed availability until May 22, 2020; all other products are not guaranteed and are only available while supplies last!
- Usually outgoing In Color products fly off the shelves so 2018-2020 In Color products will be the first items to go!
- If you have any questions, please feel free to contact me!
Click here to go to my Stampin’ Up! Online store to see what’s retiring!
Click here to see the Annual Catalog Retiring List PDF (warning: very small print)
Click here to see the Mini Catalog Retiring List PDF (warning: very small print)
Again, if you have any questions, please let me know!
Only use my host code if your order is under $150 so you’ll receive Stampin’ Rewards.
by Tracy | Apr 22, 2020 | Uncategorized
Several weeks ago I shared that I would be taking a break from my blog because my mother-in-law was ill. On April 16th, Patricia peacefully passed away with my husband by her side. Unfortunately due to COVID-19 restrictions, the rest of the family could not be with her (her illness was not COVID-19 related) nor could hospice.
Thank you so much for the incredible support and heartfelt comments and emails. I read each and every one and was very, very touched. Thank you from the bottom of my heart.
I’m looking forward to getting back into my craft room and hope to start sharing projects with you soon! Later today Stampin’ Up! will be releasing a list of all the products retiring from both the Annual Catalog and Mini Catalog. Once I have access to the list(s), I will post again today so you can see that information.
Take Care.

Patricia Ann Bradley
March 4, 1930 – April 16, 2020