Today I’m sharing several variations of cards I shared last month. Once I have a card design I like, I try to change it up a bit with different colors or Designer Series Paper. Do you do that too?
I’m in love with the New Horizons Designer Series Paper. This paper makes is so easy to create an easy but pretty card! For this first card, I used a different design than my original card which you can see here (you can find the measurements and supplies I used too). The only thing I did differently is that I used Blackberry Bliss cardstock but other than that, all the supplies and measurements are the same.
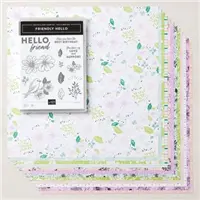
These next two cards were made using the Sale-a-Bration stamp set, Friendly Hello. This stamp set can be earned free during Sale-a-Bration with a $100 order and it includes a package of Friendly Hello 12″ x 12″ Designer Series Paper. You can see the original card here (you also find a free tutorial) for measurements I used but I’ll include the supplies for these next two cards down below because I changed up what I used.
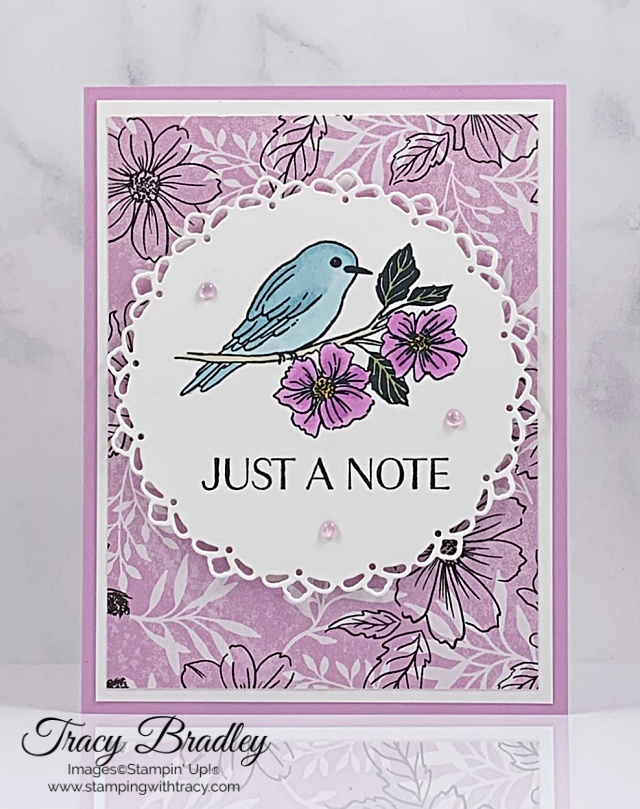
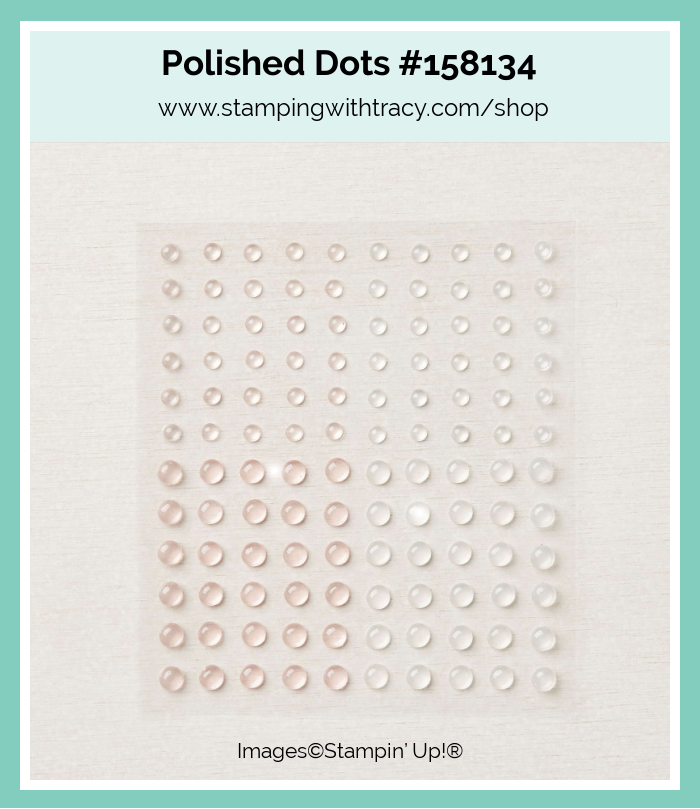
This first card has a base of Fresh Freesia cardstock and I used Friendly Hello Designer Series Paper. I stamped the bird and sentiment using Memento Ink and then colored the bird and flowers using these Stampin’ Blends: Balmy Blue (Light & Dark), Fresh Freesia (Light & Dark), Crumb Cake (Light), Daffodil Delight (Dark) and Mossy Meadow (Light). I colored the Polished Dots using the Dark Fresh Freesia Stampin’ Blend.
This next card has a base of Balmy Blue cardstock. I used Simply Marbleous 6″ x 6″ Designer Series Paper which is also a Sale-a-Bration gift you can choose with a $50 purchase. I colored the bird using the same Stampin’ Blends as I did for the card above. I colored the Polished Dots using the Dark Balmy Blue Stampin’ Blend.
Sale-a-Bration ends on February 28, 2022! Below are all the products you can choose from with every $50 or $100 purchase (before tax/shipping). Click on each product for more information.
This Supply List is for the second and third card. As mentioned above, you can refer to this post for the supplies needed for the first card. If you need any stamping supplies, I’d love to be your demonstrator! You can place an order by clicking any of the images below to go to my Stampin’ Up! online store.
The inspiration for today’s card came from fellow demonstrator, Brian King. You can see his beautiful card, here.
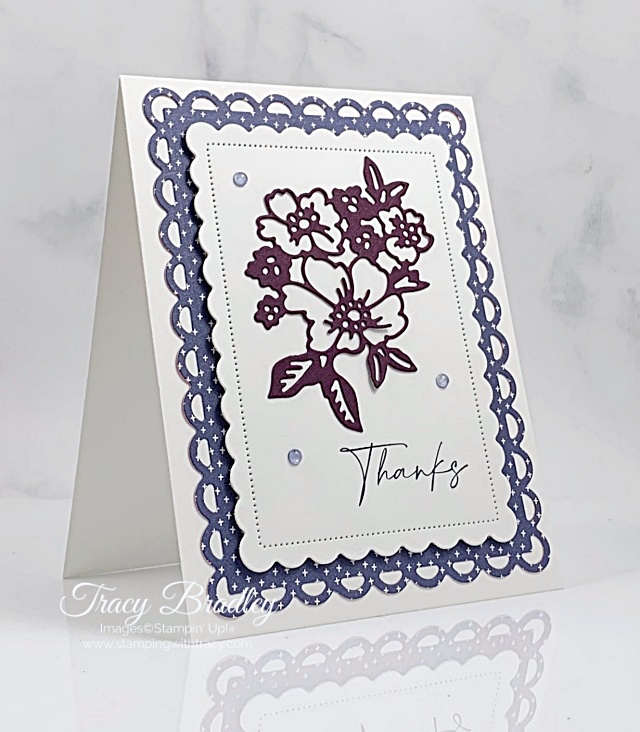
I started with a piece of Thick Basic White cardstock for the base of my card. Then, I adhered a piece of Sunshine & Rainbows Designer Series Paper that I cut out using the Scalloped Contours Dies. Using these same dies, I cut another rectangle out of Basic White cardstock and then stamped the sentiment in Misty Moonlight ink towards the bottom.
I used the Penned Flowers Dies to cut the flowers out of Blackberry Bliss cardstock. I added small dots of Multipurpose Glue to the back of the flowers and then placed them on the Basic White rectangle (if you’d like this step to be much easier, I’d recommend using our Adhesive Sheets). I added Stampin’ Dimensionals to the back of the rectangle and adhered it to the front of the card.
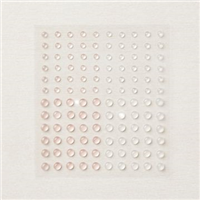
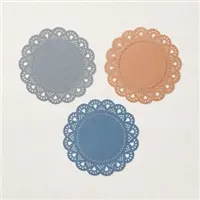
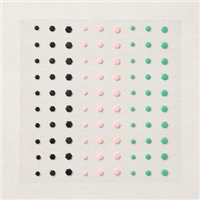
I love our Polished Dots and reach for them over and over again! It’s so easy to color these dots using Stampin’ Blends in a color that will match your card (as of this writing, they are in low inventory status)! I used the Light Misty Moonlight Stampin’ Blend to color three of the Polished Dots and then added them to the front of my card.
Supply List
Below you’ll find all the Stampin’ Up! supplies I used for today’s card. If you need any stamping supplies, I’d love to be your demonstrator! You can place an order by clicking any of the images below to go to my Stampin’ Up! online store.
Before sharing today’s card, I wanted to share this update from Stampin’ Up! about the Natural Tones Stampin’ Blends:
The new Natural Tones Stampin’ Blends from the All Together promotion have been a huge hit and we’re happy to see so many people embrace these new marker shades!
Unfortunately, because of global shipping delays, our North America stock of markers may sell out before our restock shipment arrives. This means there will be a period of time where the markers, and collections that include the markers, will be unavailable for purchase.
The good news is that the Natural Tones Stampin’ Blends are a permanent addition to our marker collection, and we are optimistic that they will be back in stock by the launch of our 2022–2023 Annual Catalog! If you don’t snag your markers before they sell out this time around, you can purchase them in May.
Today’s fun fold card features several Sale-a-Bration products. Sale-a-Bration is that time of year when you can earn free products with every $50 or $100 you spend (before tax and shipping). If you’ve never heard of Sale-a-Bration, you can read all about it here. I used the Friendly Hello Bundle which includes the Friendly Hello stamp set and Friendly Hello 12″ x 12″ Designer Series Paper. It can be earned with a $100 purchase. I also used the Special Moments stamp set which can also be earned with a $100 purchase.
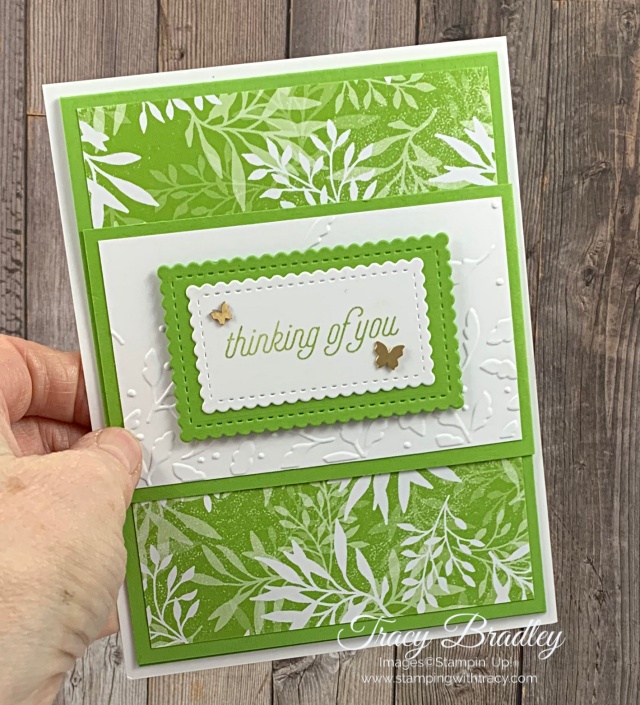
I started with a piece of Thick Basic White cardstock which is the base of the card (you can find the measurements below the Supply List). I cut a piece of Granny Apple Green cardstock that I folded in half and adhered a piece of Friendly Hello Designer Series Paper to the front. I also adhered a piece of Basic White cardstock to the inside. Before adhering this piece to the card base, I cut another piece of Granny Apple Green cardstock and scored it to make a flap. I added adhesive to the front side of the flap and adhered it to the back of the Granny Apple Green/Designer Series Paper piece (use a strong adhesive such as Multipurpose Glue). Then I added adhesive to the back and placed it on the Thick Basic White cardstock.
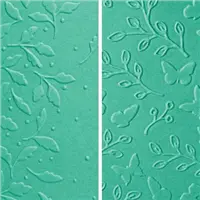
I cut a piece of Basic White cardstock and placed it inside one of the Meadow Moments embossing folders and ran it through the Stampin’ Cut & Emboss Machine. I placed it on the front of the flap. Using the Stitched So Sweetly Dies, I cut two rectangles, one out of Basic White cardstock and a slightly larger one out of Granny Apple Green cardstock. I stamped the sentiment onto the Basic White rectangle using Granny Apple Green ink and the stamp set, Special Moments and then adhered it to the Granny Apple Green rectangle. I added Stampin’ Dimensionals to the back and adhered it to the front of the card.
To complete the card, I added two Brushed Brass Butterflies to the sentiment piece.
Supply List
Below you’ll find all the Stampin’ Up! supplies I used for today’s card. If you need any stamping supplies, I’d love to be your demonstrator! You can place an order by clicking any of the images below to go to my Stampin’ Up! online store.
Thick Basic White cardstock (base): 5-1/2″ x 4-1/4″
Basic White cardstock: 3-3/4″ x 2-1/4″
Basic White cardstock (rectangle): approx. 2-1/2″ x 2-1/2″
Basic White cardstock (inside card): 5″ x 3-3/4″
Granny Apple Green cardstock: 10-1/2″ x 4″ score at 5-1/4″
Granny Apple Green cardstock: 5-1/2″ x 2-1/2″ score at 1-1/2″ on 5-1/2″ side
Granny Apple Green cardstock (rectangle): approx. 3-1/4″ x 2″
Friendly Hello Designer Series Paper: 5″ x 3-3/4″
March Paper Pumpkin
This month’s kit contains enough elements to create 9 cards—3 each of 3 designs—and 9 coordinating envelopes. This all-inclusive kit includes printed card bases, die-cut paper pieces, embellishments, adhesive, and more!
The Beyond the Horizon Paper Pumpkin Kit includes a Misty Moonlight Classic Stampin’ Spot!
This kit’s stamp set is perfect for any occasion. With sentiments that say “thanks”, “hello”, “thinking of you,” and so many more, you’ll be able to use this stamp set year round.
And if you thought one stamp set was great just wait—this month’s kit comes with a BONUS stamp set for FREE! That’s two stamp sets in one kit! It’s our way of saying THANK YOU to you our Paper Pumpkin subscribers.
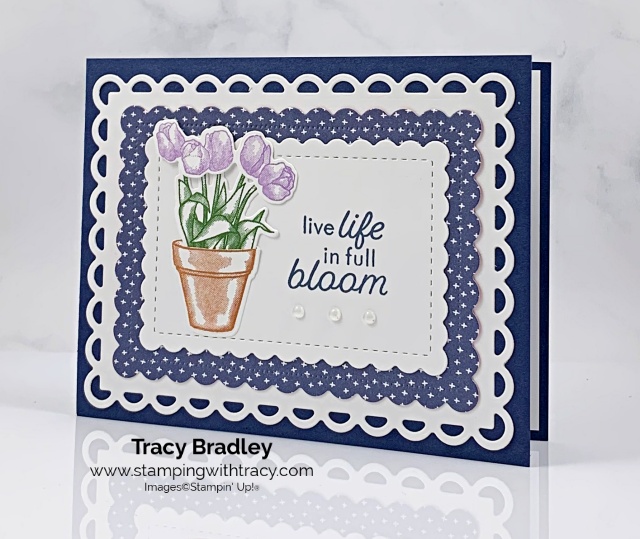
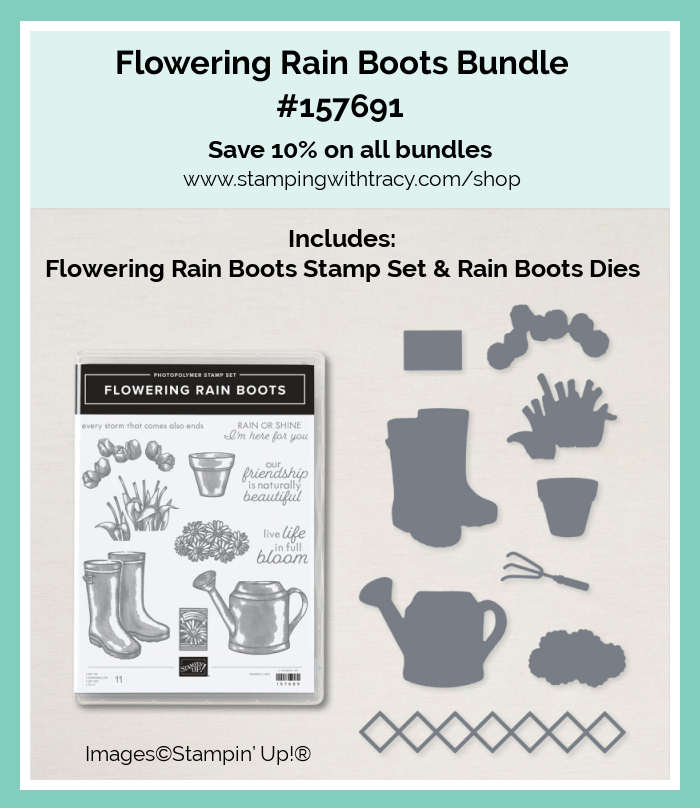
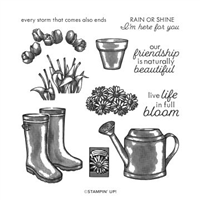
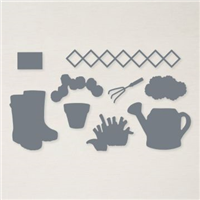
Today’s card features the Flowering Rain Boots Bundle which includes the Flowering Rain Boots stamp setand the Rain Boots Dies. I also used the Scalloped Contours Dies. We sure could use some rain here in California. I had hoped that by simply making a card with this set, that the skies would open up, but they didn’t. Maybe I need to actually use the rain boots? Rain aside, it’s a really cute bundle!
I started with a piece of Night of Navy cardstock for the base. Then I used the Scalloped Contours Dies to cut the large scalloped rectangle out of Basic White cardstock. I also used these dies to cut a piece of Sunshine & Rainbows Designer Series Paper (free with a $50 purchase during Sale-a-Bration). I used the dies again to cut another rectangle out of Basic White cardstock. I stamped the sentiment in Night of Navy ink on the smallest scalloped rectangle and then adhered all three pieces together and placed them on the front of the card.
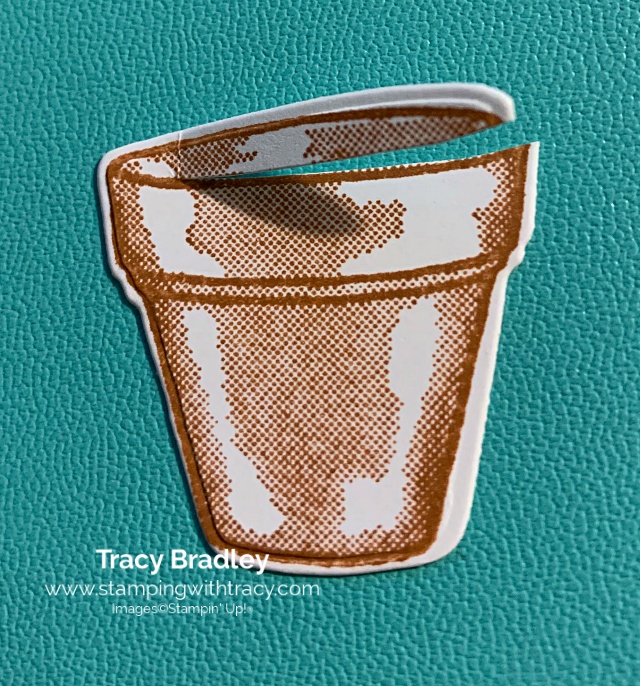
I stamped the pot in Cinnamon Cider ink, the leaves in Garden Green ink and the tulips in Highland Heather ink. I then cut out all three pieces using the Rain Boots Dies. I cut a slit in the pot so I could slide my leaves inside (I learned this from another demo – genius!). I used Multipurpose Glue to adhere the pot and leaves to the front of card and then added the tulips. I originally used Stampin’ Dimensionals on the back of the tulips but they had too much height so I took them off and just used glue.
I added three Polished Dots below the sentiment and then adhered a piece of Basic White cardstock to the inside. I think the Polished Dots are my new favorite embellishment. I keep reaching for them and they are perfect for coloring using your Stampin’ Blends.
Supply List
Below you’ll find all the Stampin’ Up! supplies I used for today’s card. If you need any stamping supplies, I’d love to be your demonstrator! You can place an order by clicking any of the images below to go to my Stampin’ Up! online store.
Night of Navy cardstock: 11″ x 4-1/4″ score at 5-1/2″
Sunshine & Rainbows Designer Series Paper: approx. 4-3/4″ x 3-1/2″
Basic White cardstock (largest rectangle): approx. 5-1/2″ x 4-1/4″
Basic White cardstock (smaller rectangle): approx. 4-1/4″ x 2-3/4″
Basic White cardstock (pot): scrap
Basic White cardstock (leaves): scrap
Basic White cardstock (tulips): scrap
Basic White cardstock (inside): 5-1/4″ x 4″
Sale-a-Bration
Sale-a-Bration is winding down and will be over on February 28th. For EVERY $50 or $100 purchase you make, you can choose a Sale-a-Bration gift. Click here for more information!
Upcoming
February 28, 2022: Sale-a-Bration Ends
February 28, 2022: Last Day to Earn two free stamp sets when you purchase the Starter Kit
March 1, 2022:New Products Being Released: Waves of the Ocean Collection (click here for the flyer)
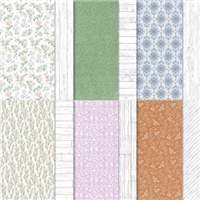
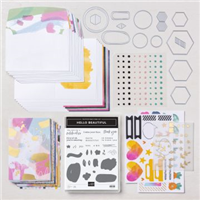
Today’s the last day my All Together Card Sampler will be available! Place a minimum $50 order using my special host code, HZQ6YW4C, and I’ll send you my All Together Card Sampler, free, plus you’ll qualify for at least one Sale-a-Bration free gift directly from Stampin’ Up!! If your order is $150 or more, please do not use the host code so you can earn Stampin’ Rewards. After you place your order (only if your order is $150 or more) contact me to let me know you’d like the Card Sampler. Read below for all the details!
Here’s What You’ll Receive:
All the paper and embellishments needed to make six cards (two each of three different designs). The paper will be cut, scored, embossed and die cut for you! You’ll need to supply your own adhesive, ink and stamp set (per Stampin’ Up! I cannot send stamped images). Envelopes will also be provided.
A PDF Tutorial with instructions, pictures, cutting measurements and a complete supply list of all the products used.
Earn at least one Bradley Point (earn ten Bradley Points and redeem them for free product).
Listed below are the supplies you’ll need to complete the cards exactly as shown(or you can use what you already own). Simply click any of the products and you’ll be taken to my Stampin’ Up! online store. When placing your order, don’t forget to use the special All TogetherCard Sampler Host Code(please do not use host code if your order is over $150 – see above).
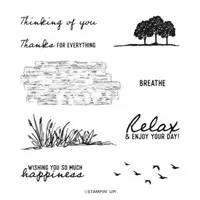
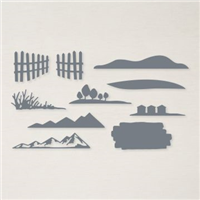
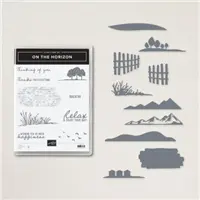
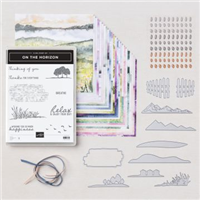
Today’s card features the Stampin’ Up! Oceanfront stamp set and the On the Horizon Bundle which includes the Horizon Dies and On the Horizon stamp set. All three of these products were not on my initial order but after seeing so many cute cards using them, I had to get them. They coordinate so well together!
I started with a piece of Just Jade cardstock and then added a layer of Basic White cardstock that I embossed using the Tasteful Textile 3D Embossing Folder. Next, I used the Stitched Rectangles Dies to cut a piece of Basic White cardstock and a larger one out of Just Jade cardstock. On the Basic White rectangle, I used the Oceanfront stamp setto stamp the sky in Balmy Blue, the water in Coastal Cabana and the sand in Crumb Cake (I stamped the sand twice so I’d have more sand). I stamped the grasses (behind the fence) using Just Jade ink. The birds were stamped in Memento Ink using the stamp set, On the Horizon.
I adhered the Basic White rectangle to the Just Jade rectangle and then added Stampin’ Dimensionals to the back before adhering it to my card front. Then I used the Horizon Dies to create the fence using Basic White cardstock and adhered them to the front of the card using Multipurpose Glue. The sentiment I used said “Thanks for everything” but I just wanted “thanks” so I used my Just Jade Stampin’ Write Marker to directly color just those words on the stamp (our markers aren’t sold individually but in a set). I cut the sentiment out using the Tasteful Labels Dies and then adhered it to the front of the card. Want to know why I placed the sentiment where I did? I pressed a little too hard when stamping the birds and one of them looked like a plane so I just covered it up!
I made a bow using our Baker’s Twine Essentials Pack, added a glue dot to the back and placed it on the sentiment piece and then added two Elegant Faceted Gems. I also added a piece of Basic White cardstock to the inside.
Supply List
Below you’ll find all the Stampin’ Up! supplies I used for today’s card. If you need any stamping supplies, I’d love to be your demonstrator! You can place an order by clicking any of the images below to go to my Stampin’ Up! online store.
The Specialty Plate is used with 3D Embossing Folders.
Place a minimum $50 order (before tax/shipping) at my Stampin’ Up! Online Storeusing this special host codeHZQ6YW4C and I’ll send you my All Together Card Sampler. It’s very important that the host code is used when placing your order EXCEPT if your order is $150 or more. Do not use the host code for an order $150 or more so you can receive Stampin’ Rewards from Stampin’ Up!. Contact me after you’ve placed the order to let me know that you’d like the Sampler – you only need to contact me if your order is $150 or more.
With your order, you’ll also receive at least one free Sale-a-Bration gift directly from Stampin’ Up! Orders must be placed by tomorrow, February 10, 2022 and the Card Samplers will be mailed approximately February 19, 2022. Please click HERE for all the details.
Upcoming
February 10, 2022: Last Day All Together Card Sampler will be available
February 10, 2022: Last Day to purchase Safari Celebration Paper Pumpkin Kit
February 28, 2022: Sale-a-Bration Ends
February 28, 2022: Last Day to Earn two free stamp sets when you purchase the Starter Kit
March 1, 2022:New Products Being Released: Waves of the Ocean Collection (click here for the flyer)
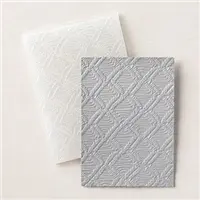
I started with a piece of Mint Macaron cardstock for the base of my card (you can find all the measurements I used below the Supply List). Then, I used the Stitched Rectangles Dies to cut a piece of Basic White cardstock, ran it through my Stampin’ Cut & Emboss Machine using the Macrame 3D Embossing Folderand then adhered it to the front of the card. I used the Stitched Rectangles Dies to cut a piece of Mint Macaron cardstock and a piece of Sunshine & Rainbows Designer Series Paper (you can earn this paper FREE with a $50 purchase during Sale-a-Bration). I adhered the two panels to the front of the card.
I used the Stitched Rectangles Dies to cut the sentiment piece out of Basic White cardstock and another one out of the same design of Designer Series Paper. I stamped the sentiment using Memento Ink and the stamp set, On the Horizon. I adhered the sentiment to the Designer Series Paper and then added Stampin’ Dimensionals to the back before adhering both to the front of the card.
Again, I used the same design of Sunshine & Rainbows Designer Series Paper to cut a butterfly using the Brilliant Wings Dies. I added one Mini Stampin’ Dimensional to the center of the butterfly before adhering it to the front of the card.
To complete my card, I added a Genial Gem to the center of the butterfly and three more to the front of the card. I also added a piece of Basic White cardstock to the inside.
Supply List
Below you’ll find all the Stampin’ Up! supplies I used for today’s card. If you need any stamping supplies, I’d love to be your demonstrator! You can place an order by clicking any of the images below to go to my Stampin’ Up! online store.
The Specialty Plate is used with 3D Embossing Folders.
Bundle Alert (save 10%) : The On the Horizon Bundle includes the On the Horizon stamp set and the Horizon Dies.
Measurements
Mint Macaron cardstock: 8-1/2″ x 5-1/2″ score at 4-1/4″
Mint Macaron cardstock: approx. 4-1/2″ x 3-1/4″
Basic White cardstock (embossed): approx. 5-3/4″ x 4-1/2″
Basic White cardstock (inside): 5-1/4″ x 4″
Basic White cardstock (sentiment): approx. 2-3/4″ x 1″
Sunshine & Rainbows Designer Series Paper: approx. 4-1/2″ x 3-1/4″
Sunshine & Rainbows Designer Series Paper (butterfly): approx. 2-3/4″ x 2″
Sunshine & Rainbows Designer Series Paper (under sentiment): approx. 2-3/4″ x 1″
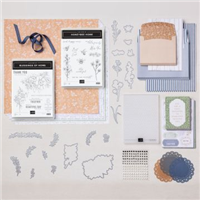
All Together Card Sampler
Place a minimum $50 order (before tax/shipping) at my Stampin’ Up! Online Storeusing this special host codeHZQ6YW4C and I’ll send you my All Together Card Sampler. It’s very important that the host code is used when placing your order EXCEPT if your order is $150 or more. Do not use the host code for an order $150 or more so you can receive Stampin’ Rewards from Stampin’ Up!. Contact me after you’ve placed the order to let me know that you’d like the Sampler – you only need to contact me if your order is $150 or more.
With your order, you’ll also receive at least one free Sale-a-Bration gift directly from Stampin’ Up! Orders must be placed by February 10, 2022 and the Card Samplers will be mailed approximately February 19, 2022. Please click HERE for all the details.
Sale-a-Bration
Sale-a-Bration is that time of year when you earn FREE product with every $50 or $100 purchase! There’s no limit to how many free items you can earn. Learn all about Sale-a-Bration here.
Coming March 1, 2022 Waves of the Ocean Collection
Click here for the flyer with all the information about this collection.
Upcoming
February 10, 2022: Last Day All Together Card Sampler will be available
February 10, 2022: Last Day to purchase Safari Celebration Paper Pumpkin Kit
February 28, 2022: Sale-a-Bration Ends
February 28, 2022: Last Day to Earn two free stamp sets when you purchase the Starter Kit
March 1, 2022:New Products Being Released: Waves of the Ocean Collection
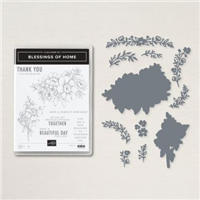
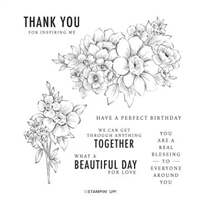
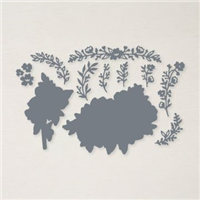
I’m posting much later than I normally do but it’s been a busy week! Today’s free tutorial is a variation of a card I posted on Monday (you can see that blog post/card here). I used the stamp set, Here Together, along with All Together 6″ x 6″ Designer Series Paper. Several of these new products can be bundled together for a greater savings and some of the products are only available while supplies last and you can download the flyer here. The free tutorial can be found below the Supply List.
Supply List
Below you’ll find all the Stampin’ Up! supplies I used for today’s card. If you need any stamping supplies, I’d love to be your demonstrator! You can place an order by clicking any of the images below to go to my Stampin’ Up! online store.
Place a minimum $50 order (before tax/shipping) at my Stampin’ Up! Online Storeusing this special host codeHZQ6YW4C and I’ll send you my All Together Card Sampler. It’s very important that the host code is used when placing your order EXCEPT if your order is $150 or more. Do not use the host code for an order $150 or more so you can receive Stampin’ Rewards from Stampin’ Up!. Contact me after you’ve placed the order to let me know that you’d like the Sampler – you only need to contact me if your order is $150 or more.
With your order, you’ll also receive at least one free Sale-a-Bration gift directly from Stampin’ Up! Orders must be placed by February 10, 2022 and the Card Samplers will be mailed approximately February 19, 2022. Please click HERE for all the details.
Before sharing my newest Card Sampler, I want to let you know that Stampin’ Up! will be performing maintenance on their server this Saturday, February 5th from 6:00 – 8:00 am (Mountain Time). This will affect the Online Ordering System. Stampin’ Up! is trying to improve the user experience and apologizes for any inconvenience this may cause.
My All Together Card Sampler is now available but only for a limited time!
My Card Samplers are easy to assemble! You’ll receive all the materials to make six cards and each one is packaged separately in its own envelope (you will need to supply your own stamp set, ink and adhesive). You’ll quickly have a card that’s ready to be mailed out to someone special. Once you’ve made all the cards in the Sampler, you’ll be able to easily replicate each card by following the easy to follow directions in the PDF (pictures are included as well).
You must use my special All Together Card SamplerHost Code when placing your order (see below) BUT if your order reaches $150 or more, please DO NOT use the host code so you can receive Stampin’ Rewards (free product directly from Stampin’ Up!).Once you place your order, simply drop me an email (only necessary if your order is over $150) letting me know that you’d like the All Together Card Sampler.
Place your order on or before February 10, 2022.
Here’s What You’ll Receive:
All the paper and embellishments needed to make six cards (two each of three different designs). The paper will be cut, scored, embossed and die cut for you! You’ll need to supply your own adhesive, ink and stamp set (per Stampin’ Up! I cannot send stamped images). Envelopes will also be provided.
A PDF Tutorial with instructions, pictures, cutting measurements and a complete supply list of all the products used.
Earn at least one Bradley Point (earn ten Bradley Points and redeem them for free product).
Listed below are the supplies you’ll need to complete the cards exactly as shown(or you can use what you already own). Simply click any of the products and you’ll be taken to my Stampin’ Up! online store. When placing your order, don’t forget to use the special All TogetherCard Sampler Host Code(please do not use host code if your order is over $150 – see above).
I don’t have a card for you today but I want to share several videos from Stampin’ Up! Did you know Stampin’ Up! has a YouTube channel? I have videos for three of our suites of products. You might learn some tips and tricks along the way as well as get some ideas for cards! This first video is all about the New Horizons Suite. I’ve included a Supply List below the video of the products in the suite. Click each product for more information.
New Horizons Suite of Products
The Layering Diorama Dies, not part of the suite, were shown in the video and were used to create the first card. Unfortunately these dies are not available at the moment.
This is the final month of Sale-a-Bration. For every $50 or $100 purchase, you can earn free products! Click here for more information.
Starter Kit
During Sale-a-Bration, when you purchase the $99 Starter Kit, you’ll be able to pick out $125 in Stampin’ Up! product PLUS you can choose two stamp sets of your choice! There’s absolutely no risk in purchasing the Starter Kit. If you are planning to purchase at least $99 worth of products, consider purchasing the Starter Kit! For more information, click here.
Upcoming
February 4, 2022:New Card Sampler Released
February 10, 2022: Last Day to Purchase Safari Celebration Paper Pumpkin Kit
February 28, 2022: Sale-a-Bration Ends
February 28, 2022: Last Day to Earn Two Free Stamps Sets When You Purchase the Starter Kit
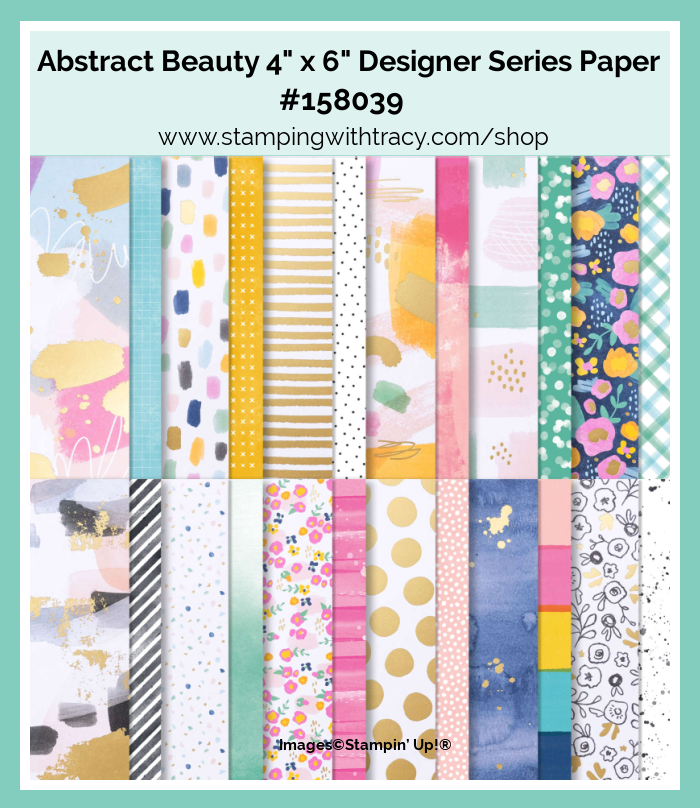
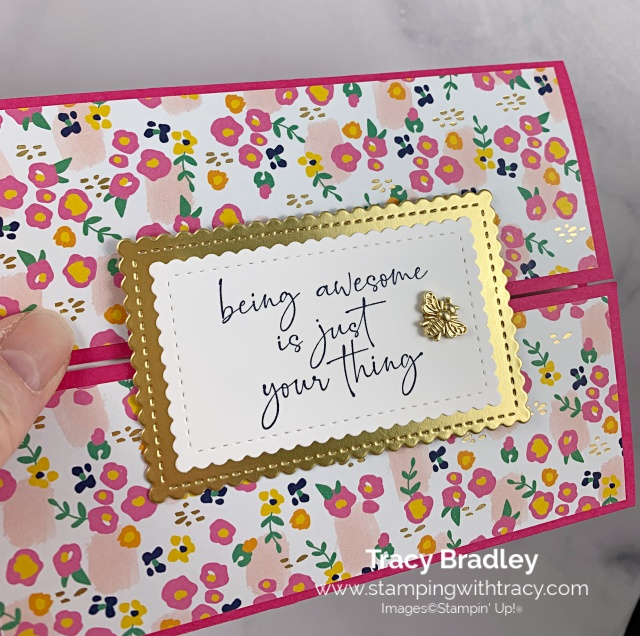
I started with a piece of Melon Mambo cardstock and scored it on the 8-1/2″ side at 2-1/8 and 6-3/8″ (or you can score it at 2-1/8″ on both ends). Then I adhered two pieces of Abstract Beauty Designer Series Paper to both of the front panels (you can find the measurements I used below the Supply List). I used the Stitched So Sweetly Dies to cut a rectangle out of a Gold Foil Sheet (there are little flecks of gold in the Designer Series Paper) and cut a smaller rectangle out of Basic White cardstock.
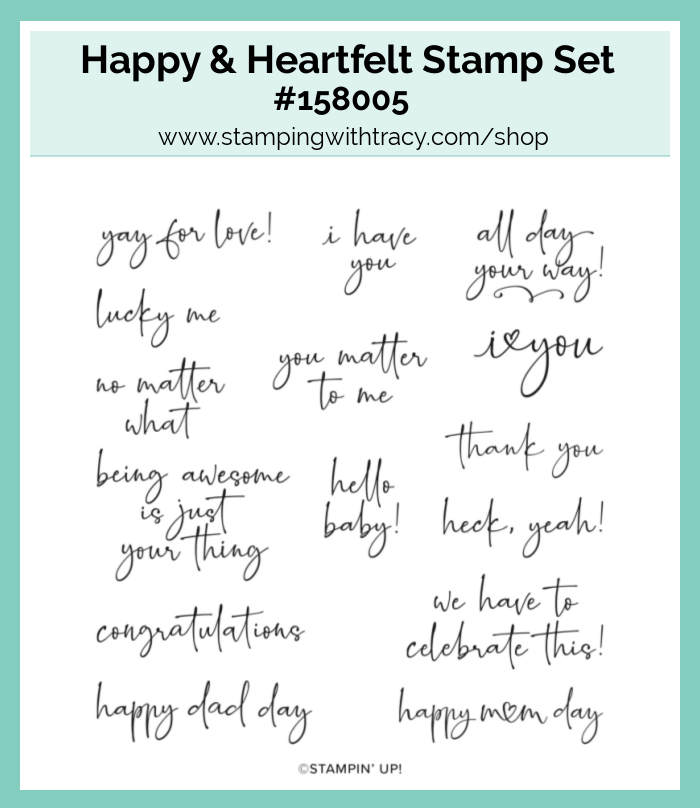
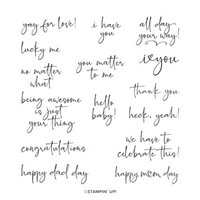
I stamped the sentiment in Night of Navy ink using the stamp set Happy & Heartfelt and then adhered the sentiment piece to the gold foil. I added Stampin’ Dimensionals to the back of the gold foil rectangle, two rows VERY close together, and adhered it to the top flap.
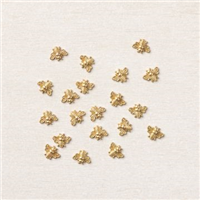
To complete my card, I adhered a piece of Basic White cardstock to the inside and added a Bumblebee Trinket next to the sentiment.
Supply List
Below you’ll find all the Stampin’ Up! supplies I used for today’s card. If you need any stamping supplies, I’d love to be your demonstrator! You can place an order by clicking any of the images below to go to my Stampin’ Up! online store.